A rooftop solar PV array is only as good as the mounts and rails it sits upon. Below we have the latest updates from 16 manufacturers across residential and commercial & industrial solar mounting systems, and approaches vary greatly. In residential, some are improve upon the tried-and-true rail-mounted configurations with metal flashing, while others venture into rail-less and deck-attached approaches. In C&I, there’s the ever-popular metal roof attachments, plus the emergence of molded-plastic cradles and even an attempt at rooftop trackers.The 2023 Solar Rooftop BOS Buyer’s Guide is now available
It includes mounting, racking and wire management Solar Panel Mounting Accessories
EcoFasten, an Esdec company, offers installer-friendly, cost-effective solar PV roof mounts and racking systems for the U.S. solar industry. The company has been in business since 2007 and its broad portfolio of patented watertight solutions are available in configurations for every roof type. RockItNumber of pieces: 4 Tools needed: One tool (1/2” deep well socket) Certifications: Conforms to UL 2703 Installation: Installing the rail-less RockIt System on composition shingle roofing is not only one of the most economical solutions on the market, it’s also one of the fastest and easiest to install, thanks to the use of the watertight EcoFasten flashing that utilizes a single fastener. Once the flashing with RockIt Slides is installed and leveled on the eave edge, move on to installing the first row of RockIt Mounts, Array Skirts, and Couplings. All that’s left is to install the PV modules and continue the installation of upslope mounts and couplings. Level the remainder of the system as you go, or after installation of the PV array is complete. Advantages: The RockIt System is the industry’s premier rail-less PV racking system available in configurations for composition shingle, tile, and metal roof types. Designed in conjunction with the needs of installers, RockIt quickly and easily installs with a single tool and features EcoFasten’s patented, watertight technology. With a convenient, easy-to-position alignment slide and a top-down leveling system, RockIt is logistically intelligent, with no need to ship or transport long rails. RockIt System provides a streamlined installation, fully integrated bonding, and North-South adjustability. Components are available in a black finish that complements both commercial and residential applications. RockIt conforms to UL 2703. ClickFitNumber of pieces: 8 with Mid Clamps & End Clamps Tools needed: One tool (1/2” deep well socket) Certifications: Conforms to UL 2703 How does it install: ClickFit on Tile: ClickFit is one of the fastest installing rail-based racking systems in the industry, thanks to the Click-in Rail assembly. ClickFit gives installers the versatility in attachment options they want and is the most cost-effective when installed on tile roofing. To begin, install the ClickFit Tile Hook and replace the tile that was moved and/or removed, or install the Tile Hook Flashing. Install ClickFit Tile Hook Sub-Flashing next, providing an additional layer of watertight protection. Place the rail in the Clickers and roll the rail into each Clicker – an audible “click” should be heard. Level if necessary, then install the ClickFit End Clamp on each rail (on whichever end you started with), place the PV module, align, and tighten. Advantages: ClickFit conforms to UL 2703, features fully integrated bonding, and is one of the fastest installing rail-based systems in the industry. Thanks to its Click-In Rail assembly, the rails can be connected to any of EcoFasten’s composition shingle, tile, and metal roof mounts in seconds, without the need for fasteners or tools. The Mid Clamps and End Clamps are compatible with PV module thickness between 30-55mm. The ClickFit system is fabricated from robust materials, such as aluminum and coated steel, to ensure corrosion-resistance and overall product longevity. ClickFit has been tested in extreme weather conditions including wind, fire, and snow. SimpleBlock-PVNumber of pieces: 3 Tools needed: Two tools (3/8” Allen head bit and ½” drive for the Mid Clamps and Coupling) Certifications: Conforms to UL 2703 How does it install: SimpleBlock-PV employs pre-installed two-oval point set screws for a super-fast installation on metal standing seam roofing. To attach SimpleBlock-PV, place the block (clamp) over the standing seam and lift up on the block until the lip engages the underside of the folded metal roof seam, then torque the set screws to 150 in-lbs. Install the first row of blocks with End Spacers and Mid Clamps. The blocks with Mid Clamps join the adjacent North-South PV modules, while the Couplings join and bond the adjacent PV modules East-West. Install remaining Blocks, Mid Clamps, Couplings, and PV modules on upslope tiers as needed. Advantages: SimpleBlock-PV is the innovative rail-less racking system for use on metal standing seam roofs. The system uses EcoFasten End Spacers and Mid Clamps with integrated bonding, while the block (clamp) employs two oval point set screws that are pre-installed to ensure a fast, easy installation without the worry of these tiny components rolling or falling from the roof. Maintaining the integrity of the roof is EcoFasten’s top priority, and the three-component system utilizes clamp-to-seam technology, eliminating the need to penetrate the roofing material. SimpleBlock-PV fits most double-lock standing seam metal roof profiles, features North-South adjustability, and conforms to UL 2703. C&I flat roof: ECO-65Number of pieces: 4 Tools needed: Two Tools (Phillips Head and ½” socket) How does it install: Once the mounting location has been determined and the roofing and insulation have been cut to accommodate the base plate, install the flashing over the two threaded studs on the base plate, followed by installing the EPDM Sealing Washers over both threaded studs. Place the F-202 Compression Bracket over the threaded studs and place a single bonded washer over each stud with the rubber side facing the roof. Thread it down the stud to the compression bracket before adding the hex nut. Install and tighten down the hex nuts to each threaded stud. Next, attach the mounting bracket or post of your choice to the F-202 using the included all-thread, and finally, waterproof the EFL-BLK-1014 following the techniques specific to the roof membrane. Advantages: The ECO-65 is a specialty direct-to-deck attachment for low-slope roofing. The roof attachment is engineered specifically for use on new or existing (retrofit) low-slope roofs constructed of rolled asphalt or membrane (TPO, EPDM, PVC). ECO-65 is used by countless manufacturers of ballasted solar racking systems to augment their products for weight reduction and seismic attachment. The ECO-65 base plate is designed to be attached specifically to wood blocking or wood decking, and the mount itself features two studs for attachment, which allows the use of larger compression brackets when needed. ECO-65 is a watertight solution compatible with any racking system. C&I metal roof: RibFitNumber of pieces: 4 Tools needed: Two Tools (¼” hex socket, ½” socket) Certifications: Conforms to UL 2703 How does it install: Determine array layout, mark center of corrugation, and draw a straight line indicating where Mounting Profile will be installed. Double-check the ridge width (minimum of 3/4”) and metal thickness (minimum of 26ga). The screw quantity tables will determine the number of screws needed. Attach the Mounting Profiles using the self-piercing screws and a cordless drill with a ¼” hex socket. The self-piercing screws are applied perpendicular to the roof surface, forming a watertight seal. Next, install End Clamps on the first two Mounting Profiles closest to the eave. Lower End Clamp to the Mounting Profile and “Click” the clamp over the side flanges. Place the first module, align and slide the End Clamp flush with the module frame. Tighten End Clamps and begin installing Mid Clamps. Complete by repeating the steps for each column of modules using the Mid Clamp Clicker as a spacer for consistent E-W gap between modules. Advantages: The RibFit system is an easy to install, four-component, rail-less solar racking system designed for use on metal roofs. The RibFit system conforms to UL 2703 and consists of an aluminum slide that attaches directly to the top of the metal panel rib. Minimal components and integrated bonding pins reduce installation times when compared to rail-based systems. RibFit mounts modules in landscape orientation and is compatible with most metal R-panel and trapezoidal roof panels with a ridge width of ¾ inch or greater and 26-gauge or thicker. The RibFit system utilizes three levels of watertight protection for longevity and peace of mind. QB-1 Number of pieces: 4 Tools needed: One Tool (½” socket) How does it install: QB-1 on Tile: QB-1’s strong, versatile post & base make it an ideal solution then mounting solar on tile roofing. To begin, locate each row of mounts and mark them off. Align the vertical fastener holes of the QB-1 Base over the center rafter mark then align the horizontal fastener holes over the snapped row line. Remove the QB-1 Base and place it over predrilled & backfilled pilot holes and secure fasteners. Secure the post to the QB-1 Base. Once the underlayment is on, install the tile-level flashing, cutting where needed to allow the post to pass through it. Place the cut tile back into position and apply sealant where the post and the flashing meet. Attaching the desired bracket or L-Foot completes the installation. Advantages: The super-strong and versatile QB-1 rail-based racking system includes a base that attaches to a variety of roof types including composition shingle, tile, shake, slate, and metal shingle. QB-1 is an ideal solution to use for new residential construction projects, as it allows for the roof to be shingled or tiled around the already installed mount. Aluminum cone flashings sized to fit the post are also available. Just combine the base with the post height of your choice (4.5” or 6.5” post heights are available), choose your flashing (12” x 12” or 18” x 18”), then choose your desired bracket. Frame MLPE MountMaterial: Stainless Steel Install: The Frame MLPE Mount attaches, mounts and fully bonds module level power electronics (MLPE) to the module frame using a single-bolt clip. Key feature: This accessory can be used with any racking system to attach the MLPE to the module frame. Contact: info@ecofastensolar.com
Number of pieces: 4 Tools needed: One tool (1/2” deep well socket) Certifications: Conforms to UL 2703
Installation: Installing the rail-less RockIt System on composition shingle roofing is not only one of the most economical solutions on the market, it’s also one of the fastest and easiest to install, thanks to the use of the watertight EcoFasten flashing that utilizes a single fastener. Once the flashing with RockIt Slides is installed and leveled on the eave edge, move on to installing the first row of RockIt Mounts, Array Skirts, and Couplings. All that’s left is to install the PV modules and continue the installation of upslope mounts and couplings. Level the remainder of the system as you go, or after installation of the PV array is complete.
Advantages: The RockIt System is the industry’s premier rail-less PV racking system available in configurations for composition shingle, tile, and metal roof types. Designed in conjunction with the needs of installers, RockIt quickly and easily installs with a single tool and features EcoFasten’s patented, watertight technology. With a convenient, easy-to-position alignment slide and a top-down leveling system, RockIt is logistically intelligent, with no need to ship or transport long rails. RockIt System provides a streamlined installation, fully integrated bonding, and North-South adjustability. Components are available in a black finish that complements both commercial and residential applications. RockIt conforms to UL 2703.
Number of pieces: 8 with Mid Clamps & End Clamps Tools needed: One tool (1/2” deep well socket) Certifications: Conforms to UL 2703
ClickFit on Tile: ClickFit is one of the fastest installing rail-based racking systems in the industry, thanks to the Click-in Rail assembly. ClickFit gives installers the versatility in attachment options they want and is the most cost-effective when installed on tile roofing.
To begin, install the ClickFit Tile Hook and replace the tile that was moved and/or removed, or install the Tile Hook Flashing. Install ClickFit Tile Hook Sub-Flashing next, providing an additional layer of watertight protection.
Place the rail in the Clickers and roll the rail into each Clicker – an audible “click” should be heard. Level if necessary, then install the ClickFit End Clamp on each rail (on whichever end you started with), place the PV module, align, and tighten.
Advantages: ClickFit conforms to UL 2703, features fully integrated bonding, and is one of the fastest installing rail-based systems in the industry. Thanks to its Click-In Rail assembly, the rails can be connected to any of EcoFasten’s composition shingle, tile, and metal roof mounts in seconds, without the need for fasteners or tools. The Mid Clamps and End Clamps are compatible with PV module thickness between 30-55mm.
The ClickFit system is fabricated from robust materials, such as aluminum and coated steel, to ensure corrosion-resistance and overall product longevity. ClickFit has been tested in extreme weather conditions including wind, fire, and snow.
Number of pieces: 3 Tools needed: Two tools (3/8” Allen head bit and ½” drive for the Mid Clamps and Coupling) Certifications: Conforms to UL 2703
How does it install: SimpleBlock-PV employs pre-installed two-oval point set screws for a super-fast installation on metal standing seam roofing. To attach SimpleBlock-PV, place the block (clamp) over the standing seam and lift up on the block until the lip engages the underside of the folded metal roof seam, then torque the set screws to 150 in-lbs.
Install the first row of blocks with End Spacers and Mid Clamps. The blocks with Mid Clamps join the adjacent North-South PV modules, while the Couplings join and bond the adjacent PV modules East-West. Install remaining Blocks, Mid Clamps, Couplings, and PV modules on upslope tiers as needed.
Advantages: SimpleBlock-PV is the innovative rail-less racking system for use on metal standing seam roofs. The system uses EcoFasten End Spacers and Mid Clamps with integrated bonding, while the block (clamp) employs two oval point set screws that are pre-installed to ensure a fast, easy installation without the worry of these tiny components rolling or falling from the roof. Maintaining the integrity of the roof is EcoFasten’s top priority, and the three-component system utilizes clamp-to-seam technology, eliminating the need to penetrate the roofing material. SimpleBlock-PV fits most double-lock standing seam metal roof profiles, features North-South adjustability, and conforms to UL 2703.
Number of pieces: 4 Tools needed: Two Tools (Phillips Head and ½” socket)
How does it install: Once the mounting location has been determined and the roofing and insulation have been cut to accommodate the base plate, install the flashing over the two threaded studs on the base plate, followed by installing the EPDM Sealing Washers over both threaded studs. Place the F-202 Compression Bracket over the threaded studs and place a single bonded washer over each stud with the rubber side facing the roof. Thread it down the stud to the compression bracket before adding the hex nut. Install and tighten down the hex nuts to each threaded stud. Next, attach the mounting bracket or post of your choice to the F-202 using the included all-thread, and finally, waterproof the EFL-BLK-1014 following the techniques specific to the roof membrane.
Advantages: The ECO-65 is a specialty direct-to-deck attachment for low-slope roofing. The roof attachment is engineered specifically for use on new or existing (retrofit) low-slope roofs constructed of rolled asphalt or membrane (TPO, EPDM, PVC). ECO-65 is used by countless manufacturers of ballasted solar racking systems to augment their products for weight reduction and seismic attachment. The ECO-65 base plate is designed to be attached specifically to wood blocking or wood decking, and the mount itself features two studs for attachment, which allows the use of larger compression brackets when needed. ECO-65 is a watertight solution compatible with any racking system.
Number of pieces: 4 Tools needed: Two Tools (¼” hex socket, ½” socket) Certifications: Conforms to UL 2703
How does it install: Determine array layout, mark center of corrugation, and draw a straight line indicating where Mounting Profile will be installed. Double-check the ridge width (minimum of 3/4”) and metal thickness (minimum of 26ga). The screw quantity tables will determine the number of screws needed. Attach the Mounting Profiles using the self-piercing screws and a cordless drill with a ¼” hex socket. The self-piercing screws are applied perpendicular to the roof surface, forming a watertight seal. Next, install End Clamps on the first two Mounting Profiles closest to the eave. Lower End Clamp to the Mounting Profile and “Click” the clamp over the side flanges. Place the first module, align and slide the End Clamp flush with the module frame. Tighten End Clamps and begin installing Mid Clamps. Complete by repeating the steps for each column of modules using the Mid Clamp Clicker as a spacer for consistent E-W gap between modules. Advantages: The RibFit system is an easy to install, four-component, rail-less solar racking system designed for use on metal roofs. The RibFit system conforms to UL 2703 and consists of an aluminum slide that attaches directly to the top of the metal panel rib. Minimal components and integrated bonding pins reduce installation times when compared to rail-based systems. RibFit mounts modules in landscape orientation and is compatible with most metal R-panel and trapezoidal roof panels with a ridge width of ¾ inch or greater and 26-gauge or thicker. The RibFit system utilizes three levels of watertight protection for longevity and peace of mind.
Number of pieces: 4 Tools needed: One Tool (½” socket)
How does it install: QB-1 on Tile: QB-1’s strong, versatile post & base make it an ideal solution then mounting solar on tile roofing. To begin, locate each row of mounts and mark them off. Align the vertical fastener holes of the QB-1 Base over the center rafter mark then align the horizontal fastener holes over the snapped row line. Remove the QB-1 Base and place it over predrilled & backfilled pilot holes and secure fasteners. Secure the post to the QB-1 Base.
Once the underlayment is on, install the tile-level flashing, cutting where needed to allow the post to pass through it. Place the cut tile back into position and apply sealant where the post and the flashing meet. Attaching the desired bracket or L-Foot completes the installation.
Advantages: The super-strong and versatile QB-1 rail-based racking system includes a base that attaches to a variety of roof types including composition shingle, tile, shake, slate, and metal shingle. QB-1 is an ideal solution to use for new residential construction projects, as it allows for the roof to be shingled or tiled around the already installed mount. Aluminum cone flashings sized to fit the post are also available. Just combine the base with the post height of your choice (4.5” or 6.5” post heights are available), choose your flashing (12” x 12” or 18” x 18”), then choose your desired bracket.
Install: The Frame MLPE Mount attaches, mounts and fully bonds module level power electronics (MLPE) to the module frame using a single-bolt clip.
Key feature: This accessory can be used with any racking system to attach the MLPE to the module frame.
Website | info@ecofastensolar.com | Distributors | Recent news and insight
QuickBOLT is a family-owned and operated business that works hard to solve your problems. They believe solar mounting can be easier and more affordable for everyone. QuickBOLT supplies one of the widest ranges of innovative solar mounts for residential and commercial roofs in the US market. They are most known for their patented Microflashing and BoltSeal powered mounting solutions, and have been working with installers for nearly a decade to make solar installation easier than ever before.
What’s new? This year QuickBOLT is highlighting its tailor-made solutions for Stone Coated Steel roofs (see below). This new product takes advantage of QuickBOLT’s existing designs that works with or without battens while maximizing the stability on the roof. Stone coated steel roofs were once a niche roofing material and are now becoming widely popular for their longevity and ease of installation. Solar installers and roofers alike should take advantage of the rise in popularity and adopt a solar mounting solution perfect for the job.
Certifications: UL Recognized Components, PE Tested, Miami-Dade Approved, SolarInsure Preferred Mounting Supplier QB2 with MicroflashingComponents Included: 1 3” Microflashing®, 1 QB2 Bolt, 1 L-Foot. PN #17662, 17862 Tools Needed: 1/2" Nut Setter or 6MM Hex Driver. Recommended PN# 17655. Sealant (optional) Certifications: UL Recognized Components, Miami-Dade and Florida Approved, PE Tested How does it install: Place the Microflashing over the shingle. Drive the patented Dual Drive Shoulder Screw through the rafter until the L-Foot is fully secured. You will know it is secure when you see the Microflashing mechanically compression-sealed to the roof. We call this technology: BoltSeal. Intertek Lab ASTM testing confirms that QB2 can be installed without sealant. QB2 works on Asphalt Shingle, TPO, and EPDM roofs. Advantages: QB2 only has 3 components and can be installed in less than 30 seconds. Unlike bulky sheets of flashing, Microflashing is installed without lifting shingles or removing nails. QuickBOLT is the only Top Mount in the industry that uses BoltSeal technology, which allows QB2 to be mounted on a variety of asphalt shingle, EPDM, and TPO roofs that other flashing cannot. During seasonal weather changes that may cause expansion and contraction on the rooftop, the Stainless-Steel L-Feet have the flection capacity to move with the solar array. Deck MountComponents included: 1 T-Foot, 4 Screws with Umbrella Washers. PN #16317, 16318 Tools Needed: Mfg approved sealant. ½” Nut Setter. Recommended PN# 17655. Certifications: UL Recognized Components, PE Tested How does it install: Install anywhere on the roof. No need to locate rafters. Start by placing sealant around the bottom of the T-Foot, then place on the roof. Insert all 4 hex lags and drive the screws until the umbrella washers are compressed. (To Drive Screws and Set Umbrella Washers Properly Torque PSI should not Exceed 57 Lbs/Inch). The Deck Mount works on Asphalt Shingle, TPO and EPDM roofs. Advantages: Save time with the Deck Mount by skipping the step for finding rafters. Install in 20 seconds with 4 Stainless Steel screws. The base of the mount has Silicon embedded into it and is secured to the roof with Stainless Steel Screws assembled with Umbrella Washers for superior holding and water protection. The Deck Mount comes with our 25 year manufacturer’s warranty. The L-Foot is built into the mount and comes with all hardware needed at an extremely low cost. Height Adjustable All Tile Hook - for Side Mount RailsComponents included: 1 hook, 2 screws. PN #17587, 17589, 17593 Tools needed: Recommended: Drill bit, #15433 or 15437 Hex Driver, Sealant compatible with roofing materials How does it install: Remove the tiles from the install area. Locate and mark the rafters. Place the mount and predrill the holes. Fill the predrilled holes with sealant. Drive the mounting screws to secure the mount and place the tiles back over the mount. Advantages: QuickBOLT’s versatile All Tile Roof Mounts work on Flat or Curved tile roofs. The wide range of adjustability and leverage points ensure that you can use these mounts with any tile roofing style and work around inconveniently located rafters. Conduit MountComponents included: 1 EPDM Cylinder, 1 Mounting Screw (Conduit clip and machine screw not included). PN# 16321 Tools needed: 3/8” Hex Driver. Recommended PN # 15437 Certifications: PE Tested Installation: Insert the mounting screw into your shoulder clip and the EPDM block, then drive until the block is compressed. Advantages: Speedy install in 5 seconds or less, no predrilling or sealant required. Skip locating the rafter and attach anywhere on the roof deck. Works on a variety of roof types: Asphalt Shingle, TPO, or EPDM. Uses torque-driven compression to create a watertight seal. Protects the integrity of the roof – no lifting shingles or removing nails and staples. All Stone Coated Steel HookComponents included: 1 hook, 2 screws. PN# 17640 Tools needed: Recommended: Drill bit, #15433 or 15437 Hex Driver, Sealant compatible with roofing materials Certifications: UL Recognized Components, PE Tested Installation: Remove the metal roof tile. Locate and mark the rafters. Place the mount and predrill the holes. Fill the predrilled holes with sealant. Place mount over lower roof tile, drive mounting screws to secure the mount and place roofing panels back over the mount. Advantages: The wide base allows for more range when bolting to the roof rafter and the 3 points of attachment for the arm allows you to move the arm according to the location of the barrel on curved profile models. Works on direct to deck and batten systems. Tile ReplacementsFor: Residential Components included: 1 Galva Tile. F-Tile PN# 17740, W-Tile PN# 17741, S-Tile PN# 17742 Tools needed: Tin snips Installation: Remove tile. Install QuickBOLT mount. Snip tile replacement at hook edges. Place tile replacement back in place. Advantages: Save time on the roof with our fast tile replacement installation. No grinding tile to fit with hooks. The flexible material is easy to work with and provides Long lasting solution for water protection. For use over solar mounts and for replacement of broken tiles. C&I: QB2 with Microflashing Components Included: 1 3” Microflashing®, 1 QB2 Bolt, 1 L-Foot. PN #17662, 17862 Tools Needed: 1/2" Nut Setter or 6MM Hex Driver. Recommended PN# 17655. Sealant (optional) Certifications: UL Recognized Components, Miami-Dade and Florida Approved, PE Tested How does it install: Place the Microflashing. Drive the patented Dual Drive Shoulder Screw through the rafter until the L-Foot is fully secured. You will know it is secure when you see the Microflashing mechanically compression-sealed to the roof. Intertek Lab ASTM testing confirms that QB2 can be installed without sealant. Advantages: QB2 works on more than just Asphalt Shingle. Install QB2 directly to TPO and EPDM roofs using the same simple steps that save you time and money on your installations. QuickBOLT’s patented BoltSeal technology is so powerful that you don’t need to rely on chemical sealant to keep water out, saving you an extra step on the roof.
Components Included: 1 3” Microflashing®, 1 QB2 Bolt, 1 L-Foot. PN #17662, 17862 Tools Needed: 1/2" Nut Setter or 6MM Hex Driver. Recommended PN# 17655. Sealant (optional) Certifications: UL Recognized Components, Miami-Dade and Florida Approved, PE Tested
How does it install: Place the Microflashing over the shingle. Drive the patented Dual Drive Shoulder Screw through the rafter until the L-Foot is fully secured. You will know it is secure when you see the Microflashing mechanically compression-sealed to the roof. We call this technology: BoltSeal. Intertek Lab ASTM testing confirms that QB2 can be installed without sealant. QB2 works on Asphalt Shingle, TPO, and EPDM roofs.
Advantages: QB2 only has 3 components and can be installed in less than 30 seconds. Unlike bulky sheets of flashing, Microflashing is installed without lifting shingles or removing nails. QuickBOLT is the only Top Mount in the industry that uses BoltSeal technology, which allows QB2 to be mounted on a variety of asphalt shingle, EPDM, and TPO roofs that other flashing cannot. During seasonal weather changes that may cause expansion and contraction on the rooftop, the Stainless-Steel L-Feet have the flection capacity to move with the solar array.
Components included: 1 T-Foot, 4 Screws with Umbrella Washers. PN #16317, 16318 Tools Needed: Mfg approved sealant. ½” Nut Setter. Recommended PN# 17655. Certifications: UL Recognized Components, PE Tested
How does it install: Install anywhere on the roof. No need to locate rafters. Start by placing sealant around the bottom of the T-Foot, then place on the roof. Insert all 4 hex lags and drive the screws until the umbrella washers are compressed. (To Drive Screws and Set Umbrella Washers Properly Torque PSI should not Exceed 57 Lbs/Inch). The Deck Mount works on Asphalt Shingle, TPO and EPDM roofs.
Advantages: Save time with the Deck Mount by skipping the step for finding rafters. Install in 20 seconds with 4 Stainless Steel screws. The base of the mount has Silicon embedded into it and is secured to the roof with Stainless Steel Screws assembled with Umbrella Washers for superior holding and water protection. The Deck Mount comes with our 25 year manufacturer’s warranty. The L-Foot is built into the mount and comes with all hardware needed at an extremely low cost.
Components included: 1 hook, 2 screws. PN #17587, 17589, 17593 Tools needed: Recommended: Drill bit, #15433 or 15437 Hex Driver, Sealant compatible with roofing materials
How does it install: Remove the tiles from the install area. Locate and mark the rafters. Place the mount and predrill the holes. Fill the predrilled holes with sealant. Drive the mounting screws to secure the mount and place the tiles back over the mount.
Advantages: QuickBOLT’s versatile All Tile Roof Mounts work on Flat or Curved tile roofs. The wide range of adjustability and leverage points ensure that you can use these mounts with any tile roofing style and work around inconveniently located rafters.
Components included: 1 EPDM Cylinder, 1 Mounting Screw (Conduit clip and machine screw not included). PN# 16321 Tools needed: 3/8” Hex Driver. Recommended PN # 15437 Certifications: PE Tested
Installation: Insert the mounting screw into your shoulder clip and the EPDM block, then drive until the block is compressed.
Advantages: Speedy install in 5 seconds or less, no predrilling or sealant required. Skip locating the rafter and attach anywhere on the roof deck. Works on a variety of roof types: Asphalt Shingle, TPO, or EPDM. Uses torque-driven compression to create a watertight seal. Protects the integrity of the roof – no lifting shingles or removing nails and staples.
Components included: 1 hook, 2 screws. PN# 17640 Tools needed: Recommended: Drill bit, #15433 or 15437 Hex Driver, Sealant compatible with roofing materials Certifications: UL Recognized Components, PE Tested
Installation: Remove the metal roof tile. Locate and mark the rafters. Place the mount and predrill the holes. Fill the predrilled holes with sealant. Place mount over lower roof tile, drive mounting screws to secure the mount and place roofing panels back over the mount.
Advantages: The wide base allows for more range when bolting to the roof rafter and the 3 points of attachment for the arm allows you to move the arm according to the location of the barrel on curved profile models. Works on direct to deck and batten systems.
For: Residential Components included: 1 Galva Tile. F-Tile PN# 17740, W-Tile PN# 17741, S-Tile PN# 17742 Tools needed: Tin snips
Installation: Remove tile. Install QuickBOLT mount. Snip tile replacement at hook edges. Place tile replacement back in place.
Advantages: Save time on the roof with our fast tile replacement installation. No grinding tile to fit with hooks. The flexible material is easy to work with and provides Long lasting solution for water protection. For use over solar mounts and for replacement of broken tiles.
Components Included: 1 3” Microflashing®, 1 QB2 Bolt, 1 L-Foot. PN #17662, 17862 Tools Needed: 1/2" Nut Setter or 6MM Hex Driver. Recommended PN# 17655. Sealant (optional) Certifications: UL Recognized Components, Miami-Dade and Florida Approved, PE Tested
How does it install: Place the Microflashing. Drive the patented Dual Drive Shoulder Screw through the rafter until the L-Foot is fully secured. You will know it is secure when you see the Microflashing mechanically compression-sealed to the roof. Intertek Lab ASTM testing confirms that QB2 can be installed without sealant.
Advantages: QB2 works on more than just Asphalt Shingle. Install QB2 directly to TPO and EPDM roofs using the same simple steps that save you time and money on your installations. QuickBOLT’s patented BoltSeal technology is so powerful that you don’t need to rely on chemical sealant to keep water out, saving you an extra step on the roof.
Distributors list: Wesco, CED Greentech, CES, Codale Electric Supply, Cooper Electric, Beacon Solar Products, Griprac, Independent Electric Supply, Onesource, Ontility, Tamarack Solar Products, The Solar Raq, Boral Roofing, Chiko Solar, Platt Electric Supply, Krannich Solar, Soligent and more…
Website | rgentry@quickscrews.com | Recent news and insight
Roof Tech Inc has been engineering solar mounting solutions since 1994 with over one million rooftop installations all over Japan and North America. They offer a 25-year warranty on every product from the installation date with its AlphaSeal Technology.
What’s new? Roof Tech is providing more RT-APEX roadshows this year with more live training options. They are scheduling lunch and learns with all their distributors in specific regions and happy hours right after for those who could not attend during the workday. If you are a distributor or contractor that would like to be one of their hosted locations for free, reach out to their marketing department today at marketing@roof-tech.us. Roof Tech Inc is also working on a tile solution to expand its Mexico and southern regions market. They are predicted to be available to the market in the late fall or early winter of 2022. RT-APEX (rail-less) Number of pieces: Three to eleven based on configuration. Tools needed: Six Certifications: UL 2703,441, ICC ESR 3575, TAS 100, ASTM 2140,1970, HVHZ Certified Installation: The RT-APEX fastens to rafters or direct to the roof deck (7/16 OSB minimum) or a combination of both. Chalk lines are needed to plot the location of the bases. When fastened to a rafter, it uses five mm diameter mounting screws, eliminating the need for a pilot hole and caulking. The RT-APEX features slide-in mounting and one-step leveling to adjust and level the panels. The universal clamping feature helps to fit module thicknesses ranging from 30 to 46mm. This advanced rail-less racking system adjusts to fit over forty different PV module manufacturers' solar panels. Roof Tech's solar mounts are self-sealing with engineered integrated AlphaSeal, creating a waterproof mounting system. Advantages: The rail-less RT-APEX is faster to install without the use of rails. It also provides less weight on your residential roof to uphold the structure's integrity. Without the use of rails, there is more room for flexibility, and design helps improve the ascetics of the roof. Rail-less, deck-attached installs take half the time of traditional rafter-mounted rails with metal flashing than with the RT-APEX with flexible flashing. Design your build with the RT-APEX span calculator for free by registering here. RT-MINI II Number of pieces: Two Tools needed: Five Certifications: UL 2703,441, ICC ESR 3575, TAS 100, ASTM 2140,1970, HVHZ Certified Installation: The RT-MINI II has more options for installing rafters and handling thicker insulation on low-slope roofs. It comes with an option of two 90 mm screws to offset rafter mounting, allowing for more attachment options on any style of roof and pitch. Design your build with the newly featured RT-MINI II span calculator. Advantages: The RT-MINI II is a universal attachment for railed systems designed to be agnostic to any roof type and roof pitch engineered to withstand wind speeds up to 180 mph and ground snow up to 90 psf. The main difference between RT-MINI II and conventional flashing is the faster installation time because RT-MINI II is fastened with wood screws, eliminating the need for pilot holes and caulking. As a result, there is no damage to the seal on asphalt shingles, so the roof warranty remains intact.
Number of pieces: Three to eleven based on configuration. Tools needed: Six Certifications: UL 2703,441, ICC ESR 3575, TAS 100, ASTM 2140,1970, HVHZ Certified
Installation: The RT-APEX fastens to rafters or direct to the roof deck (7/16 OSB minimum) or a combination of both. Chalk lines are needed to plot the location of the bases. When fastened to a rafter, it uses five mm diameter mounting screws, eliminating the need for a pilot hole and caulking. The RT-APEX features slide-in mounting and one-step leveling to adjust and level the panels. The universal clamping feature helps to fit module thicknesses ranging from 30 to 46mm. This advanced rail-less racking system adjusts to fit over forty different PV module manufacturers' solar panels. Roof Tech's solar mounts are self-sealing with engineered integrated AlphaSeal, creating a waterproof mounting system.
Advantages: The rail-less RT-APEX is faster to install without the use of rails. It also provides less weight on your residential roof to uphold the structure's integrity. Without the use of rails, there is more room for flexibility, and design helps improve the ascetics of the roof. Rail-less, deck-attached installs take half the time of traditional rafter-mounted rails with metal flashing than with the RT-APEX with flexible flashing. Design your build with the RT-APEX span calculator for free by registering here.
Number of pieces: Two Tools needed: Five Certifications: UL 2703,441, ICC ESR 3575, TAS 100, ASTM 2140,1970, HVHZ Certified
Installation: The RT-MINI II has more options for installing rafters and handling thicker insulation on low-slope roofs. It comes with an option of two 90 mm screws to offset rafter mounting, allowing for more attachment options on any style of roof and pitch. Design your build with the newly featured RT-MINI II span calculator.
Advantages: The RT-MINI II is a universal attachment for railed systems designed to be agnostic to any roof type and roof pitch engineered to withstand wind speeds up to 180 mph and ground snow up to 90 psf. The main difference between RT-MINI II and conventional flashing is the faster installation time because RT-MINI II is fastened with wood screws, eliminating the need for pilot holes and caulking. As a result, there is no damage to the seal on asphalt shingles, so the roof warranty remains intact.
Distributor’s list | Website | sales@roof-tech.us | Webinar | Recent news and insight
AceClamp is a manufacturer of precision-engineered snow retention and solar mounting systems. It also manufacturers its own High-Velocity Hurricane Zone Racking System for the solar industry. Its most recent unique innovation is called Solar Snap and is an adaptive racking system built to withstand harsh weather conditions and is designed to work with any of AceClamp’s metal roof clamps. The unique cross-platform design adapts to all roof types – meaning you’ll have less inventory to maintain. Solar Snap Racking System Material: Solar Snap is constructed of aircraft-grade aluminum with stainless steel fasteners for corrosion resistance. Solar Snap is specifically designed to be installed in shoreline and island environments that experience harsh weather conditions with high winds. Solar Snap is engineered to withstand hurricane-force winds and has been tested up to 180 psf upward pressures. Serrated hex nuts lock tight and prevent backout. How does it install? Rooftop solar arrays are engineered to meet local building code requirements for a specific project. Solar Snap components are fully assembled at the factory. Step-by-step installation instructions show how to "snap" each component in place without having to pick and place various washers, screws, and bolts while balancing on a steep roof surface. Universal lock nuts are used for both top and side mount applications. The grounding stud assembly conveniently connects an entire row of PV panels to ground. Key feature: Solar Snap is adaptive, so it works with any of AceClamp’s SSMR clamps, asphalt brackets, and membrane pads to attach racking to a variety of roof types. AceClamp Solar Attachment KitNotable FeaturesNo rotating set screws to penetrate the roofing panel thanks to a patented sliding pin design.It comes fully assembled. Just drop into place and torque.Third-party tested to ensure the strictest standards for wind uplift, product loading and vibration. Basics: The AceClamp Solar Attachment Kit by PMC Industries is a precision engineered standing seam solar clamp that’s one of the fastest installing solar attachment kits on the market. As a rackless-type hold down, the AceClamp A2 along with the Solar Kit offers a low-cost alternative to secure PV panels to SSMRs (Standing Seam Metal Roofs). Plus, its patented, non-penetrating sliding-pin design helps preserve the panel warranty. The same AceClamp can also be used with an L-Foot bracket design for the attachment of rail systems used in other types of PV installations. Additional services offered: Full product design services for custom applications and solar array layouts, including wind uplift and dead loads.
Material: Solar Snap is constructed of aircraft-grade aluminum with stainless steel fasteners for corrosion resistance. Solar Snap is specifically designed to be installed in shoreline and island environments that experience harsh weather conditions with high winds. Solar Snap is engineered to withstand hurricane-force winds and has been tested up to 180 psf upward pressures. Serrated hex nuts lock tight and prevent backout.
How does it install? Rooftop solar arrays are engineered to meet local building code requirements for a specific project. Solar Snap components are fully assembled at the factory. Step-by-step installation instructions show how to "snap" each component in place without having to pick and place various washers, screws, and bolts while balancing on a steep roof surface. Universal lock nuts are used for both top and side mount applications. The grounding stud assembly conveniently connects an entire row of PV panels to ground.
Key feature: Solar Snap is adaptive, so it works with any of AceClamp’s SSMR clamps, asphalt brackets, and membrane pads to attach racking to a variety of roof types.
Notable FeaturesNo rotating set screws to penetrate the roofing panel thanks to a patented sliding pin design.It comes fully assembled. Just drop into place and torque.Third-party tested to ensure the strictest standards for wind uplift, product loading and vibration.
Basics: The AceClamp Solar Attachment Kit by PMC Industries is a precision engineered standing seam solar clamp that’s one of the fastest installing solar attachment kits on the market. As a rackless-type hold down, the AceClamp A2 along with the Solar Kit offers a low-cost alternative to secure PV panels to SSMRs (Standing Seam Metal Roofs). Plus, its patented, non-penetrating sliding-pin design helps preserve the panel warranty. The same AceClamp can also be used with an L-Foot bracket design for the attachment of rail systems used in other types of PV installations.
Additional services offered: Full product design services for custom applications and solar array layouts, including wind uplift and dead loads.
SunModo, meaning “the way of the sun,” is a private U.S. company headquartered in Vancouver, Wash., that is focused on innovative racking and mounting solutions for professional installers in the fast-growing solar industry. SunModo’s solar racking solutions are at work in 15 countries, and from Hawaii to Connecticut, and their commitment to innovation can be seen across their product line, which includes 20-plus patents, from residential rooftops to large-scale ground-mounts. SMR SystemHow does it install: One tool assembly and Pop-On technology allow fast and worry-free installation. Fast and easy Pop-On L-Foot Adaptor speeds installation and eliminates old-fashioned T-Bolts. Rail pops into Adaptor quickly and securely. Fully structural bonding splice with fast and easy single bolt installation. The Bonding Pop-On Universal Mid Clamps accommodate PV module frame heights ranging from 30mm to 50mm. Clamp pops on to rail easily and stays upright on rail for easy location adjustment. The Pop-On Universal End Clamps provide fast and easy install with a single SKU for any module thickness. The wire management clip is specially designed for a fast and secure solution for wire management. Pair SMR with one of our industry leading mounting options and save money and time on your residential solar installations. For a more interactive look at SunModo’s SMR system, check out this video. Advantages: SunModo introduces the SMR Pitched Roof System, the best value pitched roof mounting system on the market. The SMR System represents a huge leap in racking technology. Optimized design makes the SMR Rails not only the lightest but also the strongest rails on the market. With fast and easy Pop-On Clamps and L-Foot adaptors, professional installers can mount, adjust, and secure PV panels with a single tool. Whether rafter or deck, portrait or landscape, the SMR System is the ideal solution for your solar installation. Save money on materials and installation time. NanoMount Number of pieces: 2 Tools needed: Either a 6mm Hex Driver or a 1/2" Hex Socket Driver Nano Deck Mount: 3/8" Hex Socket Driver Certifications: High-Velocity Hurricane Zone Approved – Passed TAS 100 (a) Wind Driven Rain Test. How does it install: SunModo recommends putting a bead of sealant on the bottom of the mount as an extra precaution – but the high performance gasket means NanoMount is not reliant solely upon user-applied sealant for protection. Both rafter and deck attachments are available so NanoMount has the flexibility to cover a wide range of scenarios and preferences. For rafter application, locate the center of the rafter in the desired roof location and drill a 6mm pilot hole. Fill the pilot hole with sealant and use either a 6mm Hex Driver or a 1/2" Hex Socket Driver to install the Lag Screw with Sealing Washer. For decking application, locate the desired roof location and install the 4X Self-Tapping Screws with Sealing Washers. Complete the solar panel installation using SunModo’s SMR rail system. Advantages: Damaging roof shingles used to be one of a solar installers’ worst challenges. SunModo’s newest patented NanoMount eliminates the need to lift shingles and and dramatically reduces the installation time. The NanoMount has an Integrated Ultra Soft Weather Sealing gasket that covers the entire bottom of the mount and is recessed to ensure proper compression. The Ultra Soft material conforms to uneven roof surfaces. There are no pre-punched holes, so the giant gasket seals around the screws to to achieve superior leak protection on roof surfaces. Pre-assembled sealing washers come with either lag bolt or decking screws to prevent water penetration from above. NanoMount has the flexibility to cover a wide range of scenarios and preferences with its verstile base that can be used for either rafter or deck mounting. C&I flat roof: SunTurf Roof MountCertifications: UL2703 How does it install: SunTurf easily achieves 7′ leading edge height with low cost and provides convenient access to roof surfaces for maintenance and repair. No cutting, welding, or drilling. Adjust height and install posts with set screws. Pipe fittings attach quickly with set screws. Two-piece pipe caps make installation easy. Structural Splice with set screws for bonding. Fast rail attachmetn with T-bolts. Advantages: The SunTurf flat roof system is perfect to elevate above obstructions such as HVAC, Pipes and Vents. The streamlined design combines the simplicity of a pipe-based system with next-level engineering. No drilling is required to attach the aluminum rails to the horizontal pipe. The system can easily achieve cost effective leading edge height of 7′ or more. By spanning over roof obstructions, the system takes full advantage of the available roof surface thereby maximizing the PV system size and increasing your ROI. The system aso provides convenient access to roof surfaces for maintenance and repair. TopTile MountNumber of pieces: 3 components for TopTile Rafter Mount, 4 components for TopTile Deck Mount Tools needed: 28mm hex socket Certifications: High-Velocity Hurricane Zone Approved – Passed TAS 100 (a) Wind Driven Rain Test. How does it install: Our patented TopTile eliminates the need to deconstruct the tile roof and significantly reduces time and minimizes tile breakage during installation. The mount works with both flat and curved tile profiles. The TopTile Mount can bed used to mount directly into roof decking without removing tiles. When installing the TopTile Deck Mount, begins with simply drilling a 1-1/2” hole into the tile. 28mm hex socket is used to install the TopTile stanchion into the deck of the roof. Spray the insulating foam sealant onto the roof deck through the three holes of the stanchion before installing the three wood screws. Simply hand form the flashing to fit literally any tile shape to provide a completely watertight installation. Attach the L-Foot to the stanchion. Complete the solar panel installation using SunModo’s SMR rail system. Advantages: No More lifting roof tiles, broken tiles or finding rafters. Say Yes to Tile Roof with SunModo’s new TopTile Mount. SunModo’s innovative TopTile Mount is the world’s first PV mounting system that is mounted entirely above the tiles. The patented mount eliminates the need to deconstruct the tile roof and significantly reduce time and minimize tile breakage during installation. The system also allows installation on the ridges of curved tiles for superior water leak protection. The TopTile Mount System features two mounting options that secure panels 4-7 inches above the tile surface, using stanchions with water-proof sealing washers and moldable flashing. Installers can choose either SunModo’s patented deck mounting system when anchoring into deck or a rafter mounting system.
How does it install: One tool assembly and Pop-On technology allow fast and worry-free installation. Fast and easy Pop-On L-Foot Adaptor speeds installation and eliminates old-fashioned T-Bolts. Rail pops into Adaptor quickly and securely. Fully structural bonding splice with fast and easy single bolt installation. The Bonding Pop-On Universal Mid Clamps accommodate PV module frame heights ranging from 30mm to 50mm. Clamp pops on to rail easily and stays upright on rail for easy location adjustment. The Pop-On Universal End Clamps provide fast and easy install with a single SKU for any module thickness. The wire management clip is specially designed for a fast and secure solution for wire management. Pair SMR with one of our industry leading mounting options and save money and time on your residential solar installations. For a more interactive look at SunModo’s SMR system, check out this video.
Advantages: SunModo introduces the SMR Pitched Roof System, the best value pitched roof mounting system on the market. The SMR System represents a huge leap in racking technology. Optimized design makes the SMR Rails not only the lightest but also the strongest rails on the market. With fast and easy Pop-On Clamps and L-Foot adaptors, professional installers can mount, adjust, and secure PV panels with a single tool. Whether rafter or deck, portrait or landscape, the SMR System is the ideal solution for your solar installation. Save money on materials and installation time.
Number of pieces: 2 Tools needed: Either a 6mm Hex Driver or a 1/2" Hex Socket Driver Nano Deck Mount: 3/8" Hex Socket Driver Certifications: High-Velocity Hurricane Zone Approved – Passed TAS 100 (a) Wind Driven Rain Test.
How does it install: SunModo recommends putting a bead of sealant on the bottom of the mount as an extra precaution – but the high performance gasket means NanoMount is not reliant solely upon user-applied sealant for protection. Both rafter and deck attachments are available so NanoMount has the flexibility to cover a wide range of scenarios and preferences. For rafter application, locate the center of the rafter in the desired roof location and drill a 6mm pilot hole. Fill the pilot hole with sealant and use either a 6mm Hex Driver or a 1/2" Hex Socket Driver to install the Lag Screw with Sealing Washer. For decking application, locate the desired roof location and install the 4X Self-Tapping Screws with Sealing Washers. Complete the solar panel installation using SunModo’s SMR rail system.
Advantages: Damaging roof shingles used to be one of a solar installers’ worst challenges. SunModo’s newest patented NanoMount eliminates the need to lift shingles and and dramatically reduces the installation time. The NanoMount has an Integrated Ultra Soft Weather Sealing gasket that covers the entire bottom of the mount and is recessed to ensure proper compression. The Ultra Soft material conforms to uneven roof surfaces. There are no pre-punched holes, so the giant gasket seals around the screws to to achieve superior leak protection on roof surfaces. Pre-assembled sealing washers come with either lag bolt or decking screws to prevent water penetration from above. NanoMount has the flexibility to cover a wide range of scenarios and preferences with its verstile base that can be used for either rafter or deck mounting.
How does it install: SunTurf easily achieves 7′ leading edge height with low cost and provides convenient access to roof surfaces for maintenance and repair. No cutting, welding, or drilling. Adjust height and install posts with set screws. Pipe fittings attach quickly with set screws. Two-piece pipe caps make installation easy. Structural Splice with set screws for bonding. Fast rail attachmetn with T-bolts.
Advantages: The SunTurf flat roof system is perfect to elevate above obstructions such as HVAC, Pipes and Vents. The streamlined design combines the simplicity of a pipe-based system with next-level engineering. No drilling is required to attach the aluminum rails to the horizontal pipe. The system can easily achieve cost effective leading edge height of 7′ or more. By spanning over roof obstructions, the system takes full advantage of the available roof surface thereby maximizing the PV system size and increasing your ROI. The system aso provides convenient access to roof surfaces for maintenance and repair.
Number of pieces: 3 components for TopTile Rafter Mount, 4 components for TopTile Deck Mount Tools needed: 28mm hex socket Certifications: High-Velocity Hurricane Zone Approved – Passed TAS 100 (a) Wind Driven Rain Test.
How does it install: Our patented TopTile eliminates the need to deconstruct the tile roof and significantly reduces time and minimizes tile breakage during installation. The mount works with both flat and curved tile profiles. The TopTile Mount can bed used to mount directly into roof decking without removing tiles. When installing the TopTile Deck Mount, begins with simply drilling a 1-1/2” hole into the tile. 28mm hex socket is used to install the TopTile stanchion into the deck of the roof. Spray the insulating foam sealant onto the roof deck through the three holes of the stanchion before installing the three wood screws. Simply hand form the flashing to fit literally any tile shape to provide a completely watertight installation. Attach the L-Foot to the stanchion. Complete the solar panel installation using SunModo’s SMR rail system.
Advantages: No More lifting roof tiles, broken tiles or finding rafters. Say Yes to Tile Roof with SunModo’s new TopTile Mount. SunModo’s innovative TopTile Mount is the world’s first PV mounting system that is mounted entirely above the tiles. The patented mount eliminates the need to deconstruct the tile roof and significantly reduce time and minimize tile breakage during installation. The system also allows installation on the ridges of curved tiles for superior water leak protection. The TopTile Mount System features two mounting options that secure panels 4-7 inches above the tile surface, using stanchions with water-proof sealing washers and moldable flashing. Installers can choose either SunModo’s patented deck mounting system when anchoring into deck or a rafter mounting system.
What’s new? The biggest news from Sollega is its recent UL 3741 certification with SMA America. The system meets UL 3741 without MLPE or mid-circuit interrupters of any kind, which means potentially removing thousands of dollars from a large flat-roof job (about 7 and 9 cents per watt cost savings by removing module-level switches). There is also a reliability and safety benefit that comes with reducing the number of connectors within the array by a factor of three. FR510-6 (UL 3741 Certified)Components included: FR510-6 Ballasted Racking system with wire management clips and bonding clips (FR-SBJ). Tools needed: ½” socket wrench Certifications: UL2703, UL3741 Certified with SMA, CPS, Solectria, Solis (Ginlong) and GoodWe Commercial Inverters Installation: Sollega, leading hybrid ballasted flat roof/ground mount racking provider has joined forces to certify the Sollega FastRack 510-6 with SMA Sunny Tripower CORE1 inverters, CPS, Solectria, Solis, Ginlong and GoodWe inverters as the first system to market that complies with Underwriters Laboratory (UL) 3741 Photovoltaic Hazard Control Systems (PVHCS) and National Electric Code (NEC) 690.12 rapid shutdown of PV Systems on buildings without module-level power electronics (MLPE) or switches. Inverter must be installed within 1’ of the PV array boundary and all stringing for that inverter must be within the PV array boundary. Our wire clips provide the required “airgap” and meet UL3741. Advantages: Eliminate the upfront cost to procure and install MLPE’s and reduce the DC connections to 1/3 the count when installing MLPE’s. Long term O&M savings. Safer installation with reduced component failure.
Components included: FR510-6 Ballasted Racking system with wire management clips and bonding clips (FR-SBJ). Tools needed: ½” socket wrench Certifications: UL2703, UL3741 Certified with SMA, CPS, Solectria, Solis (Ginlong) and GoodWe Commercial Inverters
Installation: Sollega, leading hybrid ballasted flat roof/ground mount racking provider has joined forces to certify the Sollega FastRack 510-6 with SMA Sunny Tripower CORE1 inverters, CPS, Solectria, Solis, Ginlong and GoodWe inverters as the first system to market that complies with Underwriters Laboratory (UL) 3741 Photovoltaic Hazard Control Systems (PVHCS) and National Electric Code (NEC) 690.12 rapid shutdown of PV Systems on buildings without module-level power electronics (MLPE) or switches. Inverter must be installed within 1’ of the PV array boundary and all stringing for that inverter must be within the PV array boundary. Our wire clips provide the required “airgap” and meet UL3741.
Advantages: Eliminate the upfront cost to procure and install MLPE’s and reduce the DC connections to 1/3 the count when installing MLPE’s. Long term O&M savings. Safer installation with reduced component failure.
AEROCOMPACT, founded in 2014, designs, engineers, and manufactures flat roof, ground mount, and metal roof solar mounting solutions. Its racking systems are compact, aerodynamic, and easy to install, and the company prides itself solving the most challenging site conditions, such as with high wind/snow loads, or if required, a highly distributed ballasted ground mount solution for landfill or brownfield projects. Close to 2 GW of power installed with mounting systems from AEROCOMPACT.
What’s new? AEROCOMPACT’s proprietary design tool, AeroTOOL, was updated to reflect the latest wind tunnel tests and meets the latest code requirements for all available modules. The turnaround time for projects is within 48 hours. In July, the new CompactFLAT systems will be available with many improvements enhancing our successful flat roof systems. A free CompactMETAL sample box with all parts can be requested. CompactMETAL TMNumber of pieces: Three parts including the self-grounding End- and Mid-Clamps. Four parts if an elevation is desired on standing seam metal roofs. Tools needed: Cordless screwdriver (drill bit provided) & torque wrench Certifications: UL 2703 How it installs: Following our detailed plans, the specified CompactMETAL TM Kits matching the standing seam can be preinstalled throughout the array before laying the modules. This ensures an easy and intuitive installation and avoids a tedious row-by-row installation effort. The preassembled universal end-clamps and mid-clamps with grounding pins are simply clicked into the short rail segments. The modular design allows for a minimal use of parts and offers the option to elevate the modules. The cable management will be achieved with provided cable ties while laying the modules. Finally, the grounding lugs and bonding jumpers will enable a secure system grounding. Advantages: A flexible solution for “all” metal roof types that requires fewer and pre-assembled parts. It provides more possibilities through a unique modular design to allow for various heights and tilts. The system results in cost savings on materials and labor due to rail-less approach and comes with a 25-year product warranty. CompactMETAL TSNumber of pieces: Three parts including the self-grounding End- and Mid-Clamps. Four parts if an elevation is desired and six parts for a titled option on trapezoidal metal roofs. Tools needed: Cordless screwdriver & torque wrench Certifications: UL 2703 How it installs: Following our detailed plans, the CompactMETAL TS short rails can be preinstalled throughout the array along the trapezoidal crowns before laying the modules. This ensures an easy and intuitive installation and avoids a tedious row-by-row installation effort. The preassembled universal end-clamps and mid-clamps with grounding pins are simply clicked into the short rails. The modular design allows for a minimal use of parts and offers options to elevate or tilt the modules. The cable management will be achieved with provided cable ties while laying the modules. Finally, the grounding lugs and bonding jumpers will enable a secure system grounding. Advantages: A flexible solution for “all” metal roof types that requires fewer and pre-assembled parts. It provides more possibilities through a unique modular design to allow for various heights and tilts. The system results in cost savings on materials and labor due to rail-less approach and comes with a 25-year product warranty. CompactMETAL TLNumber of pieces: Three parts including the self-grounding End- and Mid-Clamps. Four parts if an elevation is desired and six parts for a titled option on trapezoidal metal roofs. Tools needed: Cordless screwdriver & torque wrench Certifications: UL 2703 How it installs: Following our detailed plans, the CompactMETAL TL bridge rails can be preinstalled throughout the array bridging two trapezoidal crowns before laying the modules. This ensures an easy and intuitive installation and avoids a tedious row-by-row installation effort. The preassembled universal end-clamps and mid-clamps with grounding pins are simply clicked into the bridge rails. The modular design allows for a minimal use of parts and offers options to elevate or tilt the modules. The cable management will be achieved with provided cable ties while laying the modules. Finally, the grounding lugs and bonding jumpers will enable a secure system grounding. Advantages: A flexible solution for “all” metal roof types that requires fewer and pre-assembled parts. It provides more possibilities through a unique modular design to allow for various heights and tilts. The system results in cost savings on materials and labor due to rail-less approach and comes with a 25-year product warranty. CompactFLAT S05/S10/S15Number of pieces: Eight parts including the self-grounding End- and Mid-Clamps. Roof attachments, additional module support brackets, microinverter clamps and cable management pipes may be optional. Tools needed: Cordless screwdriver & torque wrench Certifications: UL 2703, wind tunnel tested How it installs: Following our detailed documentation, pre-install the end- and mid-clamps onto the CompactFLAT S front-, connector-, and end-brackets. Measure and place brackets according to the prepared construction package. Utilize the provided cable ties while laying the modules onto the brackets and tighten the end- and mid-clamps. Install the wind deflectors to the back of the brackets. If required, connect the optional ballast trays and anchor point connections. Place ballast blocks with the supplied protection pads according to plan. The cable management can be achieved with optional cable pipes. Finally, the grounding lugs will enable a secure system grounding. Advantages: Adaptable South-facing flat roof solution with three tilt options at 5°/10°/15° and a flexible interrow spacing with the CompactFLAT S05 system (7” to 13”). Optional Alpine support brackets provide additional module support. Optimized packaging will fit 1 MW securely into one truck. The systems come with extensive supporting documentation and a 25-year product warranty. CompactFLAT S10PLUS (East-West) Number of pieces: Six parts including the self-grounding End- and Mid-Clamps. Roof attachments, additional module support brackets, microinverter clamps and cable management pipes may be optional. Tools needed: Cordless screwdriver & torque wrench Certifications: UL 2703, wind tunnel tested How it installs: Following our detailed documentation, pre-install the end- and mid-clamps onto the CompactFLAT S10PLUS front-, middle-, and connector-brackets. Measure and place brackets according to the prepared construction package. Utilize the provided cable ties while laying the modules onto the brackets and tighten the end- and mid-clamps. If required, connect the optional ballast trays and anchor point connections. Place ballast blocks with the supplied protection pads according to plan. The cable management can be achieved with optional cable pipes. Finally, the grounding lugs will enable a secure system grounding. Advantages: Adaptable East-West-facing flat roof solution at a 10° tilt and a flexible interrow spacing (7” to 13”). It offers the highest module density and is ideal for high snow and wind loads. Less ballast requirements for low-capacity rooftops. Optional Alpine support brackets provide additional module support. Optimized packaging will fit 1 MW securely into one truck. The systems come with extensive supporting documentation and a 25-year product warranty.
Number of pieces: Three parts including the self-grounding End- and Mid-Clamps. Four parts if an elevation is desired on standing seam metal roofs. Tools needed: Cordless screwdriver (drill bit provided) & torque wrench Certifications: UL 2703
How it installs: Following our detailed plans, the specified CompactMETAL TM Kits matching the standing seam can be preinstalled throughout the array before laying the modules. This ensures an easy and intuitive installation and avoids a tedious row-by-row installation effort. The preassembled universal end-clamps and mid-clamps with grounding pins are simply clicked into the short rail segments. The modular design allows for a minimal use of parts and offers the option to elevate the modules. The cable management will be achieved with provided cable ties while laying the modules. Finally, the grounding lugs and bonding jumpers will enable a secure system grounding. Advantages: A flexible solution for “all” metal roof types that requires fewer and pre-assembled parts. It provides more possibilities through a unique modular design to allow for various heights and tilts. The system results in cost savings on materials and labor due to rail-less approach and comes with a 25-year product warranty.
Number of pieces: Three parts including the self-grounding End- and Mid-Clamps. Four parts if an elevation is desired and six parts for a titled option on trapezoidal metal roofs. Tools needed: Cordless screwdriver & torque wrench Certifications: UL 2703
How it installs: Following our detailed plans, the CompactMETAL TS short rails can be preinstalled throughout the array along the trapezoidal crowns before laying the modules. This ensures an easy and intuitive installation and avoids a tedious row-by-row installation effort. The preassembled universal end-clamps and mid-clamps with grounding pins are simply clicked into the short rails. The modular design allows for a minimal use of parts and offers options to elevate or tilt the modules. The cable management will be achieved with provided cable ties while laying the modules. Finally, the grounding lugs and bonding jumpers will enable a secure system grounding.
Advantages: A flexible solution for “all” metal roof types that requires fewer and pre-assembled parts. It provides more possibilities through a unique modular design to allow for various heights and tilts. The system results in cost savings on materials and labor due to rail-less approach and comes with a 25-year product warranty.
Number of pieces: Three parts including the self-grounding End- and Mid-Clamps. Four parts if an elevation is desired and six parts for a titled option on trapezoidal metal roofs. Tools needed: Cordless screwdriver & torque wrench Certifications: UL 2703
How it installs: Following our detailed plans, the CompactMETAL TL bridge rails can be preinstalled throughout the array bridging two trapezoidal crowns before laying the modules. This ensures an easy and intuitive installation and avoids a tedious row-by-row installation effort. The preassembled universal end-clamps and mid-clamps with grounding pins are simply clicked into the bridge rails. The modular design allows for a minimal use of parts and offers options to elevate or tilt the modules. The cable management will be achieved with provided cable ties while laying the modules. Finally, the grounding lugs and bonding jumpers will enable a secure system grounding.
Advantages: A flexible solution for “all” metal roof types that requires fewer and pre-assembled parts. It provides more possibilities through a unique modular design to allow for various heights and tilts. The system results in cost savings on materials and labor due to rail-less approach and comes with a 25-year product warranty.
Number of pieces: Eight parts including the self-grounding End- and Mid-Clamps. Roof attachments, additional module support brackets, microinverter clamps and cable management pipes may be optional. Tools needed: Cordless screwdriver & torque wrench Certifications: UL 2703, wind tunnel tested
How it installs: Following our detailed documentation, pre-install the end- and mid-clamps onto the CompactFLAT S front-, connector-, and end-brackets. Measure and place brackets according to the prepared construction package. Utilize the provided cable ties while laying the modules onto the brackets and tighten the end- and mid-clamps. Install the wind deflectors to the back of the brackets. If required, connect the optional ballast trays and anchor point connections. Place ballast blocks with the supplied protection pads according to plan. The cable management can be achieved with optional cable pipes. Finally, the grounding lugs will enable a secure system grounding.
Advantages: Adaptable South-facing flat roof solution with three tilt options at 5°/10°/15° and a flexible interrow spacing with the CompactFLAT S05 system (7” to 13”). Optional Alpine support brackets provide additional module support. Optimized packaging will fit 1 MW securely into one truck. The systems come with extensive supporting documentation and a 25-year product warranty.
Number of pieces: Six parts including the self-grounding End- and Mid-Clamps. Roof attachments, additional module support brackets, microinverter clamps and cable management pipes may be optional. Tools needed: Cordless screwdriver & torque wrench Certifications: UL 2703, wind tunnel tested
How it installs: Following our detailed documentation, pre-install the end- and mid-clamps onto the CompactFLAT S10PLUS front-, middle-, and connector-brackets. Measure and place brackets according to the prepared construction package. Utilize the provided cable ties while laying the modules onto the brackets and tighten the end- and mid-clamps. If required, connect the optional ballast trays and anchor point connections. Place ballast blocks with the supplied protection pads according to plan. The cable management can be achieved with optional cable pipes. Finally, the grounding lugs will enable a secure system grounding.
Advantages: Adaptable East-West-facing flat roof solution at a 10° tilt and a flexible interrow spacing (7” to 13”). It offers the highest module density and is ideal for high snow and wind loads. Less ballast requirements for low-capacity rooftops. Optional Alpine support brackets provide additional module support. Optimized packaging will fit 1 MW securely into one truck. The systems come with extensive supporting documentation and a 25-year product warranty.
Since 2004, K2 Systems has developed mounting system solutions for PV assemblies around the world. The company was founded in Germany but has since expanded to 10 locations worldwide and has about 20 GW installed worldwide. It began in the U.S. in 2012 as Everest Solar Systems but was recently able to rebrand to the K2 Systems name. With sophisticated product innovations and a deep customer focus, K2 Systems is the engineering leader for all your mounting system needs.
What’s new? K2 Systems is coming out with a wide range of innovative product designs based on installer feedback. The company is placing a big focus on roof attachments and is striving to provide a complete menu of options for installers to choose from that offer simple installation and strong German engineered designs. K2 also has a free online design tool, Base, where customers can design their K2 racking system projects and, once the design stage is complete, can be connected with GreenLancer for permitting and engineering services. Splice Foot X & XLNumber of pieces: 3 Tools needed: ¼” Nut Driver Certifications: UL 2703, UL 441, TAS 100, ICC ESR 3575 How does it install: The Splice Foot X & XL roof attachments are preassembled with K2 EverSeal, a flexible flashing rubber seal. Mark the roof attachment locations on the roof, then simply peel off the protective paper backing and stick it in place. If you’re installing to the rafter, you will need to use two screws in the center holes, if you’re installing to the deck you will need to use four screws in the corner holes. Use a ¼-in. nut driver to install the screws. The provided screws are self-tapping, so pilot holes are not necessary. The screws are designed to pull the butyl into the penetration so that additional sealant is not necessary. Then you’ll use the provided T-Bolt set to attach the CrossRail directly to the attachment. You can also splice the rail with this attachment, in that case you would need to use two T-Bolts. Advantages: There is no need to pry shingles or nails because the attachment sits on top of the roofing material. There is no need for additional sealant because the product is preassembled with the K2 EverSeal butyl. There is no need for pilot holes since the screws used are self-tapping. You have the flexibility to install to the rafters or directly to the deck. You don’t have to purchase other components to splice two rails together because you can do so directly with the attachment. Big FootApplication: Residential or C&I Components included: T-Bolt Kit and Clip for Chem Link E-Curb Tools needed: 13mm Socket Certifications: UL 2703 Installation: Choose the appropriate fasteners for your structural attachment. If needed, drill your pilot holes, seal holes, and secure the Big Foot to the roof. If you choose to use Chem Link’s E-Curb then you will attach the Chem Link Clip on the bottom half of the foot. This is used to ensure proper distance when installing the Chem Link E-Curb. The back of the clip should hit the wall of the E-Curb. Follow Chem Link E-Curb installation manual for detailed steps on how to install the E-Curb. Advantages: The Big Foot provides a higher profile for clearing obstructions at 6.1" tall. It has a T-Bolt slot in the middle that allows for 1.5" of adjustability. It’s compatible with Chem Link’s 3" E-Curb, which reduces sealant usage, and the E-Curb clip is included in the kit to maintain manufacture warranty. T-Bolt hardware included is also included so you can secure the attachment to K2’s CrossRail systems. C&I: The South FaceApplication: C&I Number of pieces: 4 pieces needed, additional optional. SF Ridge, SF Mat, K2 End Clamp, Ballast or Anchors Tools needed: 13mm and 11mm Socket, Tape Measure, Drill Certifications: ASCE 7-16, SEAOC PV2, UL 2703, Wind Tunnel Tested, IBC and IRC Compliant Installation: Mark your array layout and layout chassis accordingly. Lay your ballast block according to your engineered design. If necessary, you can also install anchors using the SF Anchor Bracket. Ensure the chassis are level and add mats where needed for roof undulations. Install modules and tighten end clamps. Advantages: South facing ballasted system optimized for US market with optional anchoring. The mats come preassembled on the chassis to protect the roof surface and they have a built-in patented feature that accounts for thermal expansion. You can lay modules in place without have to install the clamps first. The sliding, self-aligning end clamp allows for adjustable inter-row spacing, which allows you to maximize the array density per job. Shipping costs are reduced because the racking is all stackable. Can be installed in landscape or portrait orientation. K2 Conduit Clamp KitsApplication: Both Residential and C&I Material: Stainless steel Installation: There are four variations of this product to help you easily install. The first option is to install it on composition shingle roofs, and it comes with a small metal flashing almost identical to the K2 Flash. The second option is to install the clamp with the preassembled EverSeal butyl directly to the roof using a self-tapping wood screw. The third option is to install it directly to the South Face system using the hole directly on the chassis. And the final option is to install the clamp directly to the CrossRail channel using a T-Bolt. Key feature: Whichever way you prefer to use it, the K2 Conduit Clamp is simple to install with a toolless snap fit design and is compatible with 3/4" or 1" conduit. If installing it to the roof, you can install it directly to the deck. The clamp has a 360 range so you can turn it anyway you need to run the conduit properly.
Number of pieces: 3 Tools needed: ¼” Nut Driver Certifications: UL 2703, UL 441, TAS 100, ICC ESR 3575
How does it install: The Splice Foot X & XL roof attachments are preassembled with K2 EverSeal, a flexible flashing rubber seal. Mark the roof attachment locations on the roof, then simply peel off the protective paper backing and stick it in place. If you’re installing to the rafter, you will need to use two screws in the center holes, if you’re installing to the deck you will need to use four screws in the corner holes. Use a ¼-in. nut driver to install the screws. The provided screws are self-tapping, so pilot holes are not necessary. The screws are designed to pull the butyl into the penetration so that additional sealant is not necessary. Then you’ll use the provided T-Bolt set to attach the CrossRail directly to the attachment. You can also splice the rail with this attachment, in that case you would need to use two T-Bolts.
Advantages: There is no need to pry shingles or nails because the attachment sits on top of the roofing material. There is no need for additional sealant because the product is preassembled with the K2 EverSeal butyl. There is no need for pilot holes since the screws used are self-tapping. You have the flexibility to install to the rafters or directly to the deck. You don’t have to purchase other components to splice two rails together because you can do so directly with the attachment.
Application: Residential or C&I Components included: T-Bolt Kit and Clip for Chem Link E-Curb Tools needed: 13mm Socket Certifications: UL 2703
Installation: Choose the appropriate fasteners for your structural attachment. If needed, drill your pilot holes, seal holes, and secure the Big Foot to the roof. If you choose to use Chem Link’s E-Curb then you will attach the Chem Link Clip on the bottom half of the foot. This is used to ensure proper distance when installing the Chem Link E-Curb. The back of the clip should hit the wall of the E-Curb. Follow Chem Link E-Curb installation manual for detailed steps on how to install the E-Curb.
Advantages: The Big Foot provides a higher profile for clearing obstructions at 6.1" tall. It has a T-Bolt slot in the middle that allows for 1.5" of adjustability. It’s compatible with Chem Link’s 3" E-Curb, which reduces sealant usage, and the E-Curb clip is included in the kit to maintain manufacture warranty. T-Bolt hardware included is also included so you can secure the attachment to K2’s CrossRail systems.
Application: C&I Number of pieces: 4 pieces needed, additional optional. SF Ridge, SF Mat, K2 End Clamp, Ballast or Anchors Tools needed: 13mm and 11mm Socket, Tape Measure, Drill Certifications: ASCE 7-16, SEAOC PV2, UL 2703, Wind Tunnel Tested, IBC and IRC Compliant
Installation: Mark your array layout and layout chassis accordingly. Lay your ballast block according to your engineered design. If necessary, you can also install anchors using the SF Anchor Bracket. Ensure the chassis are level and add mats where needed for roof undulations. Install modules and tighten end clamps.
Advantages: South facing ballasted system optimized for US market with optional anchoring. The mats come preassembled on the chassis to protect the roof surface and they have a built-in patented feature that accounts for thermal expansion. You can lay modules in place without have to install the clamps first. The sliding, self-aligning end clamp allows for adjustable inter-row spacing, which allows you to maximize the array density per job. Shipping costs are reduced because the racking is all stackable. Can be installed in landscape or portrait orientation.
Application: Both Residential and C&I Material: Stainless steel
Installation: There are four variations of this product to help you easily install. The first option is to install it on composition shingle roofs, and it comes with a small metal flashing almost identical to the K2 Flash. The second option is to install the clamp with the preassembled EverSeal butyl directly to the roof using a self-tapping wood screw. The third option is to install it directly to the South Face system using the hole directly on the chassis. And the final option is to install the clamp directly to the CrossRail channel using a T-Bolt.
Key feature: Whichever way you prefer to use it, the K2 Conduit Clamp is simple to install with a toolless snap fit design and is compatible with 3/4" or 1" conduit. If installing it to the roof, you can install it directly to the deck. The clamp has a 360 range so you can turn it anyway you need to run the conduit properly.
PanelClaw is the No. 1 flat roof racking provider in North America, having been deployed on over 11,000 projects totaling more than 2 GW in more than 35 countries around the world. They focus exclusively on flat roof systems. PanelClaw was acquirred by ESDEC in 2020. C&I: clawFRNumber of pieces: 8 (+ available wire management accessories) Tools needed: Single tool installation Certifications: ANSI/UL 2703-2015 Listing, Class A Fire Rating, SEAOC PV1 and PV2 2017 full compliance, Full DMV-GL technical and operational bankability report, 25-year limited product warranty. How does it install: ClawFR allows you to build the racking before modules arrive or hang modules as you build, letting site conditions and project conditions dictate optimal order of operations, not the racking. A single-bolt hardware kit and a small set of SKUs combined with a rail-based design provide for fast and efficient array construction in a variety of tilts and configurations. ClawFR features tool-less module attachment and pre-installed roof protection pads. Minimal ballast and roof attachment requirements yield excellent walkway access for both building and maintaining the system. Advantages: PanelClaw’s flagship clawFR platform is a fast-installing racking system available in 5 and 10-degree tilts with 3 different row-spacing options and a 10-degree dual tilt configuration. Powered by clawOS software, clawFR has been installed in more than 10,000 projects and has transformed the way flat-roof PV is designed and deployed.
Number of pieces: 8 (+ available wire management accessories) Tools needed: Single tool installation Certifications: ANSI/UL 2703-2015 Listing, Class A Fire Rating, SEAOC PV1 and PV2 2017 full compliance, Full DMV-GL technical and operational bankability report, 25-year limited product warranty.
How does it install: ClawFR allows you to build the racking before modules arrive or hang modules as you build, letting site conditions and project conditions dictate optimal order of operations, not the racking. A single-bolt hardware kit and a small set of SKUs combined with a rail-based design provide for fast and efficient array construction in a variety of tilts and configurations. ClawFR features tool-less module attachment and pre-installed roof protection pads. Minimal ballast and roof attachment requirements yield excellent walkway access for both building and maintaining the system.
Advantages: PanelClaw’s flagship clawFR platform is a fast-installing racking system available in 5 and 10-degree tilts with 3 different row-spacing options and a 10-degree dual tilt configuration. Powered by clawOS software, clawFR has been installed in more than 10,000 projects and has transformed the way flat-roof PV is designed and deployed.
Since 1992, S-5! has been an authority on metal roof attachment solutions. S-5!’s zero-penetration clamps attach ancillary items to standing seam and exposed-fastened metal roofs, while maintaining roof integrity and warranties. All S-5! products are warranted for the life of the roof (and solar). Manufactured in their ISO 9001-15 certified U.S. factory, S-5! products are now installed on more than 2.5 million metal roofs worldwide, including 4.6 GW of PV on some of the world’s largest buildings, such as the corporate headquarters for Apple, Google, IBM, NATO and NREL.
What’s new? Not only is a metal/solar roof system less expensive upfront than other roof+solar system combinations, but it’s also likely to result in a significantly higher lifetime return-on-investment. Metal roofing is also the most sustainable roofing type and is conducive to lower solar installation costs. To that end, S-5! has seen an increase in demand for its solar solutions. The company created the PVKONCEAL module skirt to pair with its signature solar solution, the PVKIT direct-attach, rail-less metal roof attachment. Additionally, with wire management best practices always an important consideration, S-5! created a new wire management solution―the CanDuit conduit clamp. S-5-N clampNumber of pieces: 2 Tools needed: electric screw gun (bit tip provided) Certifications: material- ASTM B 221-04A, B 308/308M, B 597, B 807, E 527-83, A 276/276M; manufacturing- ISO 9001-15; performance lab testing- ISO 17025; product evaluation- ICC-ES (Evaluation Report ESR-3869) How does it install: The S-5-N clamp can be used for rail mounting or rail-less Direct-Attach™. Installation is quick and easy with angled setscrews. Place the insert against the base of the seam at the desired clamp location. Place the clamp over the seam and insert. Tighten the setscrews against the insert to the specified tension with the provided Torx-tip. Then, for railed systems, affix your rail (or L-Foot) using stainless M8 bolt (available separately). Or, for rail-less, simply thread the pre-assembled PVKIT into the bolt hole in the top of the clamp. You are ready to lay modules! Advantages: The S-5-N clamp is custom designed for popular 1" nail strip standing seam profiles that are popular for residential and light commercial roofs. Available in two models: Standard (2-screw) for heavy, load-critical applications, and at lower cost, the S-5-N-Mini is suitable for most PV applications. Versatile for use with rail-mounted systems or the S-5-PVKIT. Benefits include: No special tools, superior corrosion resistance and holding strength and innovative insert facilitates installation. It preserves roof warranties and ensures straight clamp position on seam. Published tested holding strength for engineered application. Warranted for the life of the roof and PV. ProteaBracketNumber of pieces: 1 (pre-assembled) Tools needed: screw gun, string line, 5/16” and 1/2” drive sockets Certifications: material- ASTM B 221-04A, B 308/308M, B 597, B 807, E 527-83, A 276/276M; manufacturing- ISO 9001-15; performance lab testing- ISO 17025 How does it install: ProteaBracket is a universal bracket for attachment of rail or the S-5-PVKIT to trapezoidal-ribbed (exposed-fastened metal profiles), with top width dimensions of up to 3” (76 mm). Secure directly onto the sides of the crown of the roof panel through the pre-punched holes. Stainless-capped, self-piercing S-5! fasteners and Protea L-Foot are included. The ProteaBracket eliminates the hunt for structure locations, enabling module, PVKIT or rail attachment anywhere on the roof. When using a side-mounted rail, orient the Protea L-Foot vertically so the hinge bolt will lock into the square hole on the slotted L-Foot. Tighten the hinge bolt. The rail will now be attached to the remaining slot to fine-tune the rail height. When utilizing ProteaBracket to mount the PVKIT or top-mounted rail, orient the L-Foot horizontally. Tighten the hinge bolt. Advantages: One part does it all. Fully assembled, the ProteaBracket attaches PV with or without rails to exposed-fastened trapezoidal sheet profiles, including pre-assembled foam core panels/insulated metal panels. Adjustable base accommodates varying rib widths, heights and angles. Attach to the sheeting-only with no messy sealants. Comes with a factory-applied, EPDM pad to ensure quick installation and a weather-proof fit. Rigorously tested for load-to-failure results in sheeting-only; pairs with the PVKIT for a direct-attach solution – or ideal for both side-bolted and bottom-bolted rail mounting. As with all S-5! products, ProteaBracket is warranted for the life of the roof (and PV); Resi or C/I. C&I standing seam: S-5! Mini clampsNumber of pieces: 1 or 2 according to roof profile specifics Tools needed: electric screw gun (bit tip provided) Certifications: material- ASTM B 221-04A, B 308/308M, B 597, B 807, E 527-83, A 276/276M; manufacturing- ISO 9001-15; performance lab testing- ISO 17025; product evaluation- ICC-ES (Evaluation Report ESR-3869) How does it install: Use the threaded holes in the clamp (with provided stainless hardware) to mount PV modules, snow guards, service walkways, lightning protection, conduit, wire chases, module-level-power electronics, fall protection and more. All use tools common to the trade with installation so simple; it can be done by a DIY installer. Just place the S-5! clamp over the seam at the desired location and tighten setscrew(s) to specified tension. M8 threaded hole provided in all clamps for attachment of L-foot (railed systems) or S-5-PVKIT (Direct-Attach™) systems without rail. Advantages: S-5! clamps are designed for brand-specific standing seam roof types, gauges and materials to maximize cost/holding strength ratios. A one-size-fits-all clamp compromises either cost or performance. All “mini” clamp versions are more than adequate for PV mounting. It is compatible with any rail system, no roof penetration needed. Compatible with S-5-PVKIT for (rail-less) Direct-Attach systems. Independently tested on more than 500 metal roof profiles for engineered applications. Warranted for the life of the roof (and PV). Available in brass, stainless C&I metal roof: SolarFootNumber of pieces: 1 (fasteners sold separately) Tools needed: electric screw gun, 3/8” Hex Socket, 13 mm (or 1/2”) Hex Socket Certifications: material- ASTM B 221-04A, B 308/308M, B 597, B 807, E 527-83, A 276/276M; manufacturing- ISO 9001-15; performance lab testing- ISO 17025 How does it install: To install SolarFoot for the rail and L-Foot of your choice: 1. Determine the location of the supporting structure of the roof; Wipe away excess oil and debris from the desired mounting location; 2. Peel the release paper from the base, align and apply to roof surface at structure location; 3. Install screws through the pre-punched holes in the SolarFoot into the structure below; and 4. Install the rail-producer’s L-Foot over the stud and secure in place with the provided M8-1.25 Hex Flange Nut tightened to 160 inch pounds (13 ft lbs). Advantages: Suitable for all exposed-fastened metal roofs and compatible with all rail manufacturer’s L-Foot components. Attaches into the structure or deck for optimal holding strength. Fastens into a variety of substrates, including wood deck, wood or steel purlins. Proper sealant selection never left to chance; no messy or risky field-applied sealant. Low center of gravity reduces moment arm commonly associated with L-Foot/rail solar racking. Stainless integrated stud and locking Flange Nut secure the L-Foot into position. Load-tested for engineered applications. Warranted for the life of the roof (and PV) S-5-PVKIT 2.0Number of pieces: 3 Tools needed: screw gun (bit tip provided), calibrated dial torque wrench Certifications: material- ASTM B 221-04A, B 308/308M, B 597, B 807, E 527-83, A 276/276M; manufacturing- ISO 9001-15; performance lab testing- ISO 17025; electrical bonding and grounding- UL 2703; ETL 1703 How does it install: The S-5-PVKIT 2.0 simply threads into any S-5! clamp or bracket. Eliminates rail altogether. Disk with bonding teeth provides grounding path module to module. The grab seats to the PV module frame by using one simple tool for both clamp and grab, providing a continuous ground path without the need for extra components along each module column. PVKIT’s pre-assembled components provide a simple, secure and economical method to “lay & play” modules. The PV module itself is the dimensional gauge for placement of ensuing attachments. Finally, the grab is tightened down to the module frame. No additional tools or steps are required. The “free” rails inherent to the roof (ribs and seams) obviate the need for added rail hardware. Advantages: S-5-PVKIT 2.0 is a rail-less attachment solution for any metal roof type with tested, engineered, direct attachment of modules to standing seam or exposed-fastened metal roofs. With high-tensile, certified aluminum and stainless, the PVKIT eliminates the need for traditional rail methods and offers impressive savings across transport and handling metrics for PV mounting systems. You’re using the rails inherent to the metal roof. Benefits over rails: 85% less weight/collateral load; 70% fewer components; up to 40% hard goods savings; up to 40% labor savings; 25% better load distribution. MLPE ClipFor: Residential and C&I Components included: Single-Piece Clip (No Fasteners) Tools needed: Channellock Pliers or Similar Certifications: UL2703 Certification In-Process How does it install: 1. Clamp the MLPE clip 3/8” from the back using the locking pliers, applying slight pressure to firmly hold the clip 2. Insert clip into slot in MPLE mounting plate. 3. Slide clip to back of slot. 4. Insert clip and MLPE onto module frame, squeezing the clip as needed to enable movement; then push up on the clip and MLPE until the clip is fully seated. 5. Release the pliers Advantages: The MLPE clip by S-5! provides a cost-effective attachment method for various MLPE devices directly to the PV module frame. Lower cost than existing solutions. Simple design, features a single clip that secures an MLPE device to the module frame. Easy to install--no fasteners required. Works with most module frames. CanDuit clampKey features: The CanDuit clamp is one piece in combination with any S-5! clamp or bracket that secures and supports chases and raceways, cable trays, gas piping, condensate lines and other round-shaped objects to metal roofs, in combination with any S-5! clamp or bracket, including the GripperFix utility mounting system. It is available in 14 sizes with outer pipe diameters ranging from .79″ (20 mm) to 4.6” (117 mm). Adjustability within each clamp enables minor size adjustment to secure most conduit and other piping. Material: Made from electro-zinc coated steel, the CanDuit clamp features two halves that clamp around the pipe or conduit with an EPDM liner pad that protects against abrasion and a threaded M8 stud that allows for attachment to S-5! products. Install:Choose the correct size CanDuit clamp for your conduit application.Determine the location to place the conduit clamp.Attach the appropriate S-5! clamp or bracket to the roof.Thread the conduit clamp into the S-5! attachment.Loosen and remove the two Phillips screws from the CanDuit clamp and remove the upper half.Insert the conduit into the clamp, then replace the upper half and tighten the two Phillips screws.
Number of pieces: 2 Tools needed: electric screw gun (bit tip provided) Certifications: material- ASTM B 221-04A, B 308/308M, B 597, B 807, E 527-83, A 276/276M; manufacturing- ISO 9001-15; performance lab testing- ISO 17025; product evaluation- ICC-ES (Evaluation Report ESR-3869)
How does it install: The S-5-N clamp can be used for rail mounting or rail-less Direct-Attach™. Installation is quick and easy with angled setscrews. Place the insert against the base of the seam at the desired clamp location. Place the clamp over the seam and insert. Tighten the setscrews against the insert to the specified tension with the provided Torx-tip. Then, for railed systems, affix your rail (or L-Foot) using stainless M8 bolt (available separately). Or, for rail-less, simply thread the pre-assembled PVKIT into the bolt hole in the top of the clamp. You are ready to lay modules!
Advantages: The S-5-N clamp is custom designed for popular 1" nail strip standing seam profiles that are popular for residential and light commercial roofs. Available in two models: Standard (2-screw) for heavy, load-critical applications, and at lower cost, the S-5-N-Mini is suitable for most PV applications. Versatile for use with rail-mounted systems or the S-5-PVKIT.
Benefits include: No special tools, superior corrosion resistance and holding strength and innovative insert facilitates installation. It preserves roof warranties and ensures straight clamp position on seam. Published tested holding strength for engineered application. Warranted for the life of the roof and PV.
Number of pieces: 1 (pre-assembled) Tools needed: screw gun, string line, 5/16” and 1/2” drive sockets Certifications: material- ASTM B 221-04A, B 308/308M, B 597, B 807, E 527-83, A 276/276M; manufacturing- ISO 9001-15; performance lab testing- ISO 17025
How does it install: ProteaBracket is a universal bracket for attachment of rail or the S-5-PVKIT to trapezoidal-ribbed (exposed-fastened metal profiles), with top width dimensions of up to 3” (76 mm). Secure directly onto the sides of the crown of the roof panel through the pre-punched holes. Stainless-capped, self-piercing S-5! fasteners and Protea L-Foot are included. The ProteaBracket eliminates the hunt for structure locations, enabling module, PVKIT or rail attachment anywhere on the roof.
When using a side-mounted rail, orient the Protea L-Foot vertically so the hinge bolt will lock into the square hole on the slotted L-Foot. Tighten the hinge bolt. The rail will now be attached to the remaining slot to fine-tune the rail height. When utilizing ProteaBracket to mount the PVKIT or top-mounted rail, orient the L-Foot horizontally. Tighten the hinge bolt.
Advantages: One part does it all. Fully assembled, the ProteaBracket attaches PV with or without rails to exposed-fastened trapezoidal sheet profiles, including pre-assembled foam core panels/insulated metal panels. Adjustable base accommodates varying rib widths, heights and angles. Attach to the sheeting-only with no messy sealants. Comes with a factory-applied, EPDM pad to ensure quick installation and a weather-proof fit. Rigorously tested for load-to-failure results in sheeting-only; pairs with the PVKIT for a direct-attach solution – or ideal for both side-bolted and bottom-bolted rail mounting. As with all S-5! products, ProteaBracket is warranted for the life of the roof (and PV); Resi or C/I.
Number of pieces: 1 or 2 according to roof profile specifics Tools needed: electric screw gun (bit tip provided) Certifications: material- ASTM B 221-04A, B 308/308M, B 597, B 807, E 527-83, A 276/276M; manufacturing- ISO 9001-15; performance lab testing- ISO 17025; product evaluation- ICC-ES (Evaluation Report ESR-3869)
How does it install: Use the threaded holes in the clamp (with provided stainless hardware) to mount PV modules, snow guards, service walkways, lightning protection, conduit, wire chases, module-level-power electronics, fall protection and more. All use tools common to the trade with installation so simple; it can be done by a DIY installer. Just place the S-5! clamp over the seam at the desired location and tighten setscrew(s) to specified tension. M8 threaded hole provided in all clamps for attachment of L-foot (railed systems) or S-5-PVKIT (Direct-Attach™) systems without rail.
Advantages: S-5! clamps are designed for brand-specific standing seam roof types, gauges and materials to maximize cost/holding strength ratios. A one-size-fits-all clamp compromises either cost or performance. All “mini” clamp versions are more than adequate for PV mounting. It is compatible with any rail system, no roof penetration needed. Compatible with S-5-PVKIT for (rail-less) Direct-Attach systems. Independently tested on more than 500 metal roof profiles for engineered applications. Warranted for the life of the roof (and PV). Available in brass, stainless
Number of pieces: 1 (fasteners sold separately) Tools needed: electric screw gun, 3/8” Hex Socket, 13 mm (or 1/2”) Hex Socket Certifications: material- ASTM B 221-04A, B 308/308M, B 597, B 807, E 527-83, A 276/276M; manufacturing- ISO 9001-15; performance lab testing- ISO 17025
How does it install: To install SolarFoot for the rail and L-Foot of your choice: 1. Determine the location of the supporting structure of the roof; Wipe away excess oil and debris from the desired mounting location; 2. Peel the release paper from the base, align and apply to roof surface at structure location; 3. Install screws through the pre-punched holes in the SolarFoot into the structure below; and 4. Install the rail-producer’s L-Foot over the stud and secure in place with the provided M8-1.25 Hex Flange Nut tightened to 160 inch pounds (13 ft lbs).
Advantages: Suitable for all exposed-fastened metal roofs and compatible with all rail manufacturer’s L-Foot components. Attaches into the structure or deck for optimal holding strength. Fastens into a variety of substrates, including wood deck, wood or steel purlins. Proper sealant selection never left to chance; no messy or risky field-applied sealant. Low center of gravity reduces moment arm commonly associated with L-Foot/rail solar racking. Stainless integrated stud and locking Flange Nut secure the L-Foot into position. Load-tested for engineered applications. Warranted for the life of the roof (and PV)
Number of pieces: 3 Tools needed: screw gun (bit tip provided), calibrated dial torque wrench Certifications: material- ASTM B 221-04A, B 308/308M, B 597, B 807, E 527-83, A 276/276M; manufacturing- ISO 9001-15; performance lab testing- ISO 17025; electrical bonding and grounding- UL 2703; ETL 1703
How does it install: The S-5-PVKIT 2.0 simply threads into any S-5! clamp or bracket. Eliminates rail altogether. Disk with bonding teeth provides grounding path module to module. The grab seats to the PV module frame by using one simple tool for both clamp and grab, providing a continuous ground path without the need for extra components along each module column.
PVKIT’s pre-assembled components provide a simple, secure and economical method to “lay & play” modules. The PV module itself is the dimensional gauge for placement of ensuing attachments. Finally, the grab is tightened down to the module frame. No additional tools or steps are required. The “free” rails inherent to the roof (ribs and seams) obviate the need for added rail hardware.
Advantages: S-5-PVKIT 2.0 is a rail-less attachment solution for any metal roof type with tested, engineered, direct attachment of modules to standing seam or exposed-fastened metal roofs. With high-tensile, certified aluminum and stainless, the PVKIT eliminates the need for traditional rail methods and offers impressive savings across transport and handling metrics for PV mounting systems. You’re using the rails inherent to the metal roof. Benefits over rails: 85% less weight/collateral load; 70% fewer components; up to 40% hard goods savings; up to 40% labor savings; 25% better load distribution.
For: Residential and C&I Components included: Single-Piece Clip (No Fasteners) Tools needed: Channellock Pliers or Similar Certifications: UL2703 Certification In-Process
1. Clamp the MLPE clip 3/8” from the back using the locking pliers, applying slight pressure to firmly hold the clip 2. Insert clip into slot in MPLE mounting plate. 3. Slide clip to back of slot. 4. Insert clip and MLPE onto module frame, squeezing the clip as needed to enable movement; then push up on the clip and MLPE until the clip is fully seated. 5. Release the pliers
Advantages: The MLPE clip by S-5! provides a cost-effective attachment method for various MLPE devices directly to the PV module frame. Lower cost than existing solutions. Simple design, features a single clip that secures an MLPE device to the module frame. Easy to install--no fasteners required. Works with most module frames.
Key features: The CanDuit clamp is one piece in combination with any S-5! clamp or bracket that secures and supports chases and raceways, cable trays, gas piping, condensate lines and other round-shaped objects to metal roofs, in combination with any S-5! clamp or bracket, including the GripperFix utility mounting system. It is available in 14 sizes with outer pipe diameters ranging from .79″ (20 mm) to 4.6” (117 mm). Adjustability within each clamp enables minor size adjustment to secure most conduit and other piping.
Material: Made from electro-zinc coated steel, the CanDuit clamp features two halves that clamp around the pipe or conduit with an EPDM liner pad that protects against abrasion and a threaded M8 stud that allows for attachment to S-5! products.
Install:Choose the correct size CanDuit clamp for your conduit application.Determine the location to place the conduit clamp.Attach the appropriate S-5! clamp or bracket to the roof.Thread the conduit clamp into the S-5! attachment.Loosen and remove the two Phillips screws from the CanDuit clamp and remove the upper half.Insert the conduit into the clamp, then replace the upper half and tighten the two Phillips screws.
Since 2007, SnapNrack’s solar mounting products have been designed to reduce installation costs, improve installation quality and safety. SnapNrack roof and ground mount systems feature a single tool installation, pre-assembled snap-in hardware, integrated wire management, integrated grounding/bonding and Class A Fire Rating in accordance with UL2703/UL1703 standards.
What’s new? SnapNrack recently expanded to roof attachments that mount directly to the deck with the SpeedSeal DeckFoot & DeckTrack. These rafter independent attachments allow for layout adjustability without needing to locate and attach to rafters. In addition to SpeedSeal Deck Mounts, the OmniBase, a new standoff base was released for flush and tilt mounted systems. TopSpeed Mounting SystemFor: Residential Components included: TopSpeed™ Mount & TopSpeed™ Clamp, ½” SnapNrack Wood Screw, uses existing SnapNrack Universal Skirt & Spacers, and railless Wire Management Tools needed: ½” socket with an impact gun for all connections and attachments Certifications: UL 2703 for Grounding/Bonding, Class A Fire Rating Type 1 & Type 2 Modules, UL Certified Modules, Stamped Structural Engineering Reports How does it install: The simplified process consists of 3 basic steps: On the ground TopSpeed Mounts are attached directly to the panels in the approved mounting locations. Then, while still on the ground, wire management begins with SnapNrack Smart Clips and MLPE Frame Kits to prep module leads & MLPEs, resulting in a faster mounting install experience. While these steps are being performed on the ground, array layout & the first row of TopSpeed Mounts with the Universal Skirt are installed. Installers are then ready to install at TopSpeed. All mounts are secured to the roof with SnapNrack’s ½” wood screws after modules are positioned in desired location. Advantages: The majority of the TopSpeed install process is performed on the ground. Except for the first row of mounts for the Universal Skirt, all TopSpeed Mounts are attached directly onto the modules before the module is brought up on the roof. TopSpeed is fundamentally changing the installation process to cut down on roof layout, staging material, and assembling of racking. This installation process also cuts down the amount of time installers are exposed to safety risks by spending long periods of time on the roof. TopSpeed brings the process to the ground for a safer experience. SnapNrack Ultra RailNumber of pieces: 5 (Rail, Mount, Splice, Mid Clamps and End Clamps) Tools needed: ½” socket with an impact gun for all connections and attachments Certifications: UL 2703 for Grounding/Bonding, Class A Fire Rating Type 1 & Type 2 Modules, UL Certified Modules, Stamped Structural Engineering Reports How does it install: Installation of SnapNrack Ultra Rail is intuitive and easy to learn. After the array is marked in accordance with the design plans, Umbrella L Feet lag into rafters with patented flashing technology that protects against roof leaks. Rails snap into mounts with spring loaded features to allow the rail to easily slide and be adjusted to the desired location and height. Finally, panels are placed on the rails secured using SnapNrack’s proprietary mid and end clamps as wires are nestled securely into the rail channel. Advantages: The Ultra Rail profile creates a channel for wires, unobstructed by splices or mounts. It doesn’t rely on zip ties which can fail over time creating opportunities for wire damage or worse. Spring loaded brackets allow the rail to snap into place and be released, without tools, and easily slide prior to leveling and tightening. SnapNrack doesn’t rely on T-Bolts that can bind or be improperly installed, resulting in a system failure. Roof penetrations are protected with a patented cone flashing feature that extends above the base of the roof attachment and sealed under a proprietary Umbrella Lag. SnapNrack RL UniversalNumber of pieces: 4 (Mount, Link, Skirt & Spacers) Tools needed: ½” socket with an impact gun for all connections and attachments Certifications: UL 2703 for Grounding/Bonding, Class A Fire Rating Type 1 & Type 2 Modules, UL Certified Modules, Stamped Structural Engineering Reports How does it install: RL-U is designed such that each install step is independent, where a single installer can install the entire system. The roof attachments are a Flash Track which provides North-South adjustability, secured with a single Umbrella Lag through SnapNrack’s patent pending Umbrella Flashing. RL-U only requires a single RL-U Mount SKU, which is used at all locations on the array. The integrated RL-U Skirt attaches to the first row of mounts, creating a strong structure for leveling and aligning the array. The RL-U Links clamp onto the top of modules securing them in place while providing row-to-row bonding, and provide an attachment point for 2-4 modules. A single installer can drop modules into place, and secure them across the top without having to reach down the roof across a module. Advantages: RL Universal is designed to provide the fastest, most intuitive install experience on the roof. The direct mount system features four basic components, with nothing larger than the size of a module, resulting in easy material management. Features include an integrated Skirt for a secure installation with sleek aesthetics, Universal Mounts used at all locations on the array & Links that can accommodate 2-4 modules. Mount & Link interference is eliminated with the unrivaled Mount offset & Link adjustability. RL-U is the only railless system to offer labor saving installation processes backed by the industry leader in residential solar. SnapNrack SpeedSeal TechnologyNumber of pieces:2 (SpeedSeal Foot or SpeedSeal Track & Lag Screw) OR5 (SpeedSeal DeckFoot or SpeedSeal DeckTrack & 4 Wood Screws) Tools needed: ½” socket with an impact gun for all connections & attachments for Foot & Track with Lag Certifications: UL 2582 Wind Driven Rain Test and ASTM E2140 Water Column Testing standards, Miami-Dade NOA No: 20-1104.01, UL 2703 for Grounding/Bonding, Class A Fire Rating Type 1 & Type 2 Modules, UL Certified Modules, Stamped Structural Engineering Reports. How does it install: SnapNrack SpeedSeal Foot & Track allows installers to lag straight to a structural member with no in-between components, and eliminates damage to shingles from the installation process. The simple install process consists of locating a rafter, filling the sealant cavity and securing to the roof. The SpeedSeal Technology takes over, compressing sealant into the cavity, shingle surfaces and lag hole, as the SpeedSeal Foot or Track is secured to the rafter. The SpeedSeal DeckFoot & DeckTrack mount directly to the deck, making installation even faster by allowing installers to lag straight to the roof deck & eliminating the need to find a rafter. Advantages: The SpeedSeal Technology portfolio save installers time on the roof with less parts and tools, while maintaining the integrity of the shingles. Metal flashing requires the use of a pry bar to “rip up” the shingles and remove nails. SpeedSeal eliminates this, so the roof remains intact, the way meant it’s meant to be, all while faster. The new SpeedSeal DeckFoot and DeckTrack provide further time savings due to their ability to by mounting directly to the roof deck. Installers no longer need to find rafters and seal missed pilot holes. Universal Wire ClampMaterial: All components to the Universal Wire Clamp are made of materials that have been selected for their ability to handle high UV exposure and extreme rooftop temperatures common under solar arrays in order to last the life of the system. It is backed by the SnapNrack 25-year Manufacturer’s Limited Product Warranty. Install: A 1/2-in. socket is all you need to install the SnapNrack Universal Wire Clamp. The Universal Wire Clamp attaches to the rail channel by snapping in a channel nut and securing a single bolt with a 1/2-in. socket. The Wire Clamp installs with the same tool as the rest of SnapNrack’s Ultra Rail System. Key feature: The Universal Wire Clamp has the capability of securing four PV wires or two Enphase Q cables, allowing a tight transition of wires from rail to rail and avoids wire hangers and cable clips.
For: Residential Components included: TopSpeed™ Mount & TopSpeed™ Clamp, ½” SnapNrack Wood Screw, uses existing SnapNrack Universal Skirt & Spacers, and railless Wire Management Tools needed: ½” socket with an impact gun for all connections and attachments Certifications: UL 2703 for Grounding/Bonding, Class A Fire Rating Type 1 & Type 2 Modules, UL Certified Modules, Stamped Structural Engineering Reports
How does it install: The simplified process consists of 3 basic steps: On the ground TopSpeed Mounts are attached directly to the panels in the approved mounting locations. Then, while still on the ground, wire management begins with SnapNrack Smart Clips and MLPE Frame Kits to prep module leads & MLPEs, resulting in a faster mounting install experience. While these steps are being performed on the ground, array layout & the first row of TopSpeed Mounts with the Universal Skirt are installed. Installers are then ready to install at TopSpeed. All mounts are secured to the roof with SnapNrack’s ½” wood screws after modules are positioned in desired location.
Advantages: The majority of the TopSpeed install process is performed on the ground. Except for the first row of mounts for the Universal Skirt, all TopSpeed Mounts are attached directly onto the modules before the module is brought up on the roof. TopSpeed is fundamentally changing the installation process to cut down on roof layout, staging material, and assembling of racking. This installation process also cuts down the amount of time installers are exposed to safety risks by spending long periods of time on the roof. TopSpeed brings the process to the ground for a safer experience.
Number of pieces: 5 (Rail, Mount, Splice, Mid Clamps and End Clamps) Tools needed: ½” socket with an impact gun for all connections and attachments Certifications: UL 2703 for Grounding/Bonding, Class A Fire Rating Type 1 & Type 2 Modules, UL Certified Modules, Stamped Structural Engineering Reports
How does it install: Installation of SnapNrack Ultra Rail is intuitive and easy to learn. After the array is marked in accordance with the design plans, Umbrella L Feet lag into rafters with patented flashing technology that protects against roof leaks. Rails snap into mounts with spring loaded features to allow the rail to easily slide and be adjusted to the desired location and height. Finally, panels are placed on the rails secured using SnapNrack’s proprietary mid and end clamps as wires are nestled securely into the rail channel.
Advantages: The Ultra Rail profile creates a channel for wires, unobstructed by splices or mounts. It doesn’t rely on zip ties which can fail over time creating opportunities for wire damage or worse. Spring loaded brackets allow the rail to snap into place and be released, without tools, and easily slide prior to leveling and tightening. SnapNrack doesn’t rely on T-Bolts that can bind or be improperly installed, resulting in a system failure. Roof penetrations are protected with a patented cone flashing feature that extends above the base of the roof attachment and sealed under a proprietary Umbrella Lag.
Number of pieces: 4 (Mount, Link, Skirt & Spacers) Tools needed: ½” socket with an impact gun for all connections and attachments Certifications: UL 2703 for Grounding/Bonding, Class A Fire Rating Type 1 & Type 2 Modules, UL Certified Modules, Stamped Structural Engineering Reports
How does it install: RL-U is designed such that each install step is independent, where a single installer can install the entire system. The roof attachments are a Flash Track which provides North-South adjustability, secured with a single Umbrella Lag through SnapNrack’s patent pending Umbrella Flashing. RL-U only requires a single RL-U Mount SKU, which is used at all locations on the array. The integrated RL-U Skirt attaches to the first row of mounts, creating a strong structure for leveling and aligning the array. The RL-U Links clamp onto the top of modules securing them in place while providing row-to-row bonding, and provide an attachment point for 2-4 modules. A single installer can drop modules into place, and secure them across the top without having to reach down the roof across a module.
Advantages: RL Universal is designed to provide the fastest, most intuitive install experience on the roof. The direct mount system features four basic components, with nothing larger than the size of a module, resulting in easy material management. Features include an integrated Skirt for a secure installation with sleek aesthetics, Universal Mounts used at all locations on the array & Links that can accommodate 2-4 modules. Mount & Link interference is eliminated with the unrivaled Mount offset & Link adjustability. RL-U is the only railless system to offer labor saving installation processes backed by the industry leader in residential solar.
Number of pieces:2 (SpeedSeal Foot or SpeedSeal Track & Lag Screw) OR5 (SpeedSeal DeckFoot or SpeedSeal DeckTrack & 4 Wood Screws)
Tools needed: ½” socket with an impact gun for all connections & attachments for Foot & Track with Lag Certifications: UL 2582 Wind Driven Rain Test and ASTM E2140 Water Column Testing standards, Miami-Dade NOA No: 20-1104.01, UL 2703 for Grounding/Bonding, Class A Fire Rating Type 1 & Type 2 Modules, UL Certified Modules, Stamped Structural Engineering Reports.
How does it install: SnapNrack SpeedSeal Foot & Track allows installers to lag straight to a structural member with no in-between components, and eliminates damage to shingles from the installation process. The simple install process consists of locating a rafter, filling the sealant cavity and securing to the roof. The SpeedSeal Technology takes over, compressing sealant into the cavity, shingle surfaces and lag hole, as the SpeedSeal Foot or Track is secured to the rafter. The SpeedSeal DeckFoot & DeckTrack mount directly to the deck, making installation even faster by allowing installers to lag straight to the roof deck & eliminating the need to find a rafter.
Advantages: The SpeedSeal Technology portfolio save installers time on the roof with less parts and tools, while maintaining the integrity of the shingles. Metal flashing requires the use of a pry bar to “rip up” the shingles and remove nails. SpeedSeal eliminates this, so the roof remains intact, the way meant it’s meant to be, all while faster. The new SpeedSeal DeckFoot and DeckTrack provide further time savings due to their ability to by mounting directly to the roof deck. Installers no longer need to find rafters and seal missed pilot holes.
Material: All components to the Universal Wire Clamp are made of materials that have been selected for their ability to handle high UV exposure and extreme rooftop temperatures common under solar arrays in order to last the life of the system. It is backed by the SnapNrack 25-year Manufacturer’s Limited Product Warranty.
Install: A 1/2-in. socket is all you need to install the SnapNrack Universal Wire Clamp. The Universal Wire Clamp attaches to the rail channel by snapping in a channel nut and securing a single bolt with a 1/2-in. socket. The Wire Clamp installs with the same tool as the rest of SnapNrack’s Ultra Rail System.
Key feature: The Universal Wire Clamp has the capability of securing four PV wires or two Enphase Q cables, allowing a tight transition of wires from rail to rail and avoids wire hangers and cable clips.
DynoRaxx has been selling professional solar racking equipment since 2009. It is the only solar racking manufacturer that uses fiberglass as the racking material for its flat-roof ballasted solution, and the main advantage is it’s a tool-less system that reduces labor installation times. C&I flat roofs: DynoRaxx Evolution FRNumber of pieces: 3 Tools needed: none, 100% tool-less Certifications: UL 467, UL 2703 Installation: The DynoRaxx Evolution FR is easy to transport, stage, and install. Installation does not require any tools to assemble resulting into major labor savings. Advantages: Since the racking only consists of three major parts and are compatible with every framed commercial solar module on the market without any special ordering or lead times. You receive the right product for the job every time. DynoBondNumber of pieces: 1, various lengths available (8”, 12”, 38”, 50”, 76”, 96”) Tools needed: None Certifications: UL 467 & UL 2703 Installation: The DynoBond is used to ground solar modules within the array. It’s a tin platted copper wiring with factory crimped stainless steel connectors that ground the modules. Advantages: The DynoBond can be used to ground solar modules in applications for residential, commercial, industrial, and utility scaled projects. The product is used by DynoRaxx for the ballasted solution and also many racking competitors are using it for their grounding needs as well.
Number of pieces: 3 Tools needed: none, 100% tool-less Certifications: UL 467, UL 2703
Installation: The DynoRaxx Evolution FR is easy to transport, stage, and install. Installation does not require any tools to assemble resulting into major labor savings. Advantages: Since the racking only consists of three major parts and are compatible with every framed commercial solar module on the market without any special ordering or lead times. You receive the right product for the job every time.
Number of pieces: 1, various lengths available (8”, 12”, 38”, 50”, 76”, 96”) Tools needed: None Certifications: UL 467 & UL 2703
Installation: The DynoBond is used to ground solar modules within the array. It’s a tin platted copper wiring with factory crimped stainless steel connectors that ground the modules.
Advantages: The DynoBond can be used to ground solar modules in applications for residential, commercial, industrial, and utility scaled projects. The product is used by DynoRaxx for the ballasted solution and also many racking competitors are using it for their grounding needs as well.
IronRidge, an Esdec company, designs and manufactures structural hardware for residential and commercial solar systems. For nearly a quarter of a century, IronRidge has worked closely with solar professionals to build strong, streamlined, and cost-effective products. IronRidge conducts thorough testing on every component in an Esdec (US) Intertek-certified Satellite lab.
What’s new? In 2022, IronRidge continues to develop solar racking offerings, including the QuickMount product line, to fully support installers from end-to-end. Recently released products include: IronRidge FlashVue comp-shingle flashings, QuickMount Lynx attachments for standing seam metal roofs, and QuickMount JayBox junction boxes. Permit Packs are also now available for purchase through its Design Assistant software, to better streamline the project design and installation process. Residential: XR Flush Mount System Number of pieces: +/- 10 Tools needed: Cordless Drill (non-impact); Impact Driver (for lag bolts); Torque Wrench (0-250 in-lbs); 7/16” Socket; 1/2" Socket; 9/16" Socket; 7/32" Drill Bit; 1/8" Drill Bit; 1/4" Drill Bit; T30 Bit; Channel Lock Pliers; #3 Phillips Bit Certifications: UL 2703 Listed, Class A Fire Rating, Water Seal Rating, Designed and Certified for Compliance with the International Building Code & ASCE/SEI-7, Florida Product Approval #FL29843 Installation: 1. Attach bases 2. Place rails 3. Secure lugs 4. Secure modules Advantages: Every component in the IronRidge XR Flush Mount System has been tested to the limit and proven in extreme environments: rain, wind and snow. Our rigorous approach has led to unique structural features, such as curved rails, universal fastening objects, innovative tile attachments and reinforced flashings. All of our products are fully-certified, code-compliant, listed to UL 2703 and backed by a 25-year warranty. C&I: XR Tilt Mount System Number of pieces: +/- 8 Tools needed: Cordless Drill (non-impact); Impact Driver (for lag bolts); Torque Wrench (0-250 in-lbs); 5/16” Socket; 7/16” Socket; 9/16” Socket (deep); String Line Certifications: UL 2703 Listed, Class A Fire Rating, Designed and Certified for Compliance with the International Building Code & ASCE/SEI-7 Installation: 1. Attach bases 2. Add tilt legs 3. Place rails 4. Secure lugs 5. Secure modules Advantages: Build strong and efficient solar arrays on flat roofs. IronRidge Tilt Mount supports a wide range of solar panel tilting angles, while also resisting the extreme wind and snow forces experienced over a building’s lifetime.The Tilt Mount System is listed to UL 2703, and compatible with most roof anchor products. Every component in the system is made with aluminum and stainless steel to ensure complete corrosion resistance. C&I: BX System Number of pieces: +/- 5 Tools needed: Torque Wrench (0-250 in-lbs); 9/16” Socket; 7/16” Socket; 1/2" Socket; String Chalk Line Certifications: UL 2703 Listed, Class A Fire Rating, Designed and Certified for Compliance with the International Building Code & ASCE/SEI-7, Wind Tunnel Testing by I.F.I. Installation: 1. Mark layout 2. Place Chassis 3. Mount MLPE (optional) 4. Lay ballast 5. Anchor system (optional) 6. Install modules 7. Complete bonding Advantages: IronRidge BX delivers superior power density and design flexibility to flat roof solar arrays. Made of a glass reinforced composite, the BX Chassis is engineered for extreme structural loading, yet is also shaped to be roof-friendly and easy to install. Contour Solar Array TrimApplication: Contour Trim is installed on a completed array Material: 6000 Series Aluminum, Black finish How does it install? The Contour Trim connects along the front facing edge of the installation. The Contour Clamp secures to bottom flange of most modules, which the Trim piece slides into, and is secured into position. Key feature: Contour Solar Array Trim is an aesthetic trim for solar array installations that provides a sleek trim (or skirt) across the south edge or around the perimeter to hide components that are visible beneath the solar panels.
Number of pieces: +/- 10 Tools needed: Cordless Drill (non-impact); Impact Driver (for lag bolts); Torque Wrench (0-250 in-lbs); 7/16” Socket; 1/2" Socket; 9/16" Socket; 7/32" Drill Bit; 1/8" Drill Bit; 1/4" Drill Bit; T30 Bit; Channel Lock Pliers; #3 Phillips Bit Certifications: UL 2703 Listed, Class A Fire Rating, Water Seal Rating, Designed and Certified for Compliance with the International Building Code & ASCE/SEI-7, Florida Product Approval #FL29843
Installation: 1. Attach bases 2. Place rails 3. Secure lugs 4. Secure modules
Advantages: Every component in the IronRidge XR Flush Mount System has been tested to the limit and proven in extreme environments: rain, wind and snow. Our rigorous approach has led to unique structural features, such as curved rails, universal fastening objects, innovative tile attachments and reinforced flashings. All of our products are fully-certified, code-compliant, listed to UL 2703 and backed by a 25-year warranty.
Number of pieces: +/- 8 Tools needed: Cordless Drill (non-impact); Impact Driver (for lag bolts); Torque Wrench (0-250 in-lbs); 5/16” Socket; 7/16” Socket; 9/16” Socket (deep); String Line Certifications: UL 2703 Listed, Class A Fire Rating, Designed and Certified for Compliance with the International Building Code & ASCE/SEI-7
Installation: 1. Attach bases 2. Add tilt legs 3. Place rails 4. Secure lugs 5. Secure modules
Advantages: Build strong and efficient solar arrays on flat roofs. IronRidge Tilt Mount supports a wide range of solar panel tilting angles, while also resisting the extreme wind and snow forces experienced over a building’s lifetime.The Tilt Mount System is listed to UL 2703, and compatible with most roof anchor products. Every component in the system is made with aluminum and stainless steel to ensure complete corrosion resistance.
Number of pieces: +/- 5 Tools needed: Torque Wrench (0-250 in-lbs); 9/16” Socket; 7/16” Socket; 1/2" Socket; String Chalk Line Certifications: UL 2703 Listed, Class A Fire Rating, Designed and Certified for Compliance with the International Building Code & ASCE/SEI-7, Wind Tunnel Testing by I.F.I.
Installation: 1. Mark layout 2. Place Chassis 3. Mount MLPE (optional) 4. Lay ballast 5. Anchor system (optional) 6. Install modules 7. Complete bonding
Advantages: IronRidge BX delivers superior power density and design flexibility to flat roof solar arrays. Made of a glass reinforced composite, the BX Chassis is engineered for extreme structural loading, yet is also shaped to be roof-friendly and easy to install.
Application: Contour Trim is installed on a completed array
Material: 6000 Series Aluminum, Black finish
How does it install? The Contour Trim connects along the front facing edge of the installation. The Contour Clamp secures to bottom flange of most modules, which the Trim piece slides into, and is secured into position.
Key feature: Contour Solar Array Trim is an aesthetic trim for solar array installations that provides a sleek trim (or skirt) across the south edge or around the perimeter to hide components that are visible beneath the solar panels.
Magerack designs, manufactures and sells innovative solar mounting systems for roof-top solar installation. Magerack Solar Mounting System and MageMount Rail-less Mounting System are turn-key solar mounting solutions that are reliable, easy to install and cost-effective. In addition, Magerack also provides a variety of innovative roof attachments for solar installation on residential and commercial and industrial metal roofs.
What’s new? Magerack has released a few mounting brackets and mounting kits for metal roof in 2022 and now provides a complete mounting brackets and rail-less solar mounting solutions for all metal roofs. Magerack Solar Mounting SystemComponents: Rail, Mid Clamp, End Clamp, Roof attachment with rail nut, and Rail splice Tools needed: 1/2” hex socket Certifications: UL 2703 Installation: It is a rail-based solar mounting system for solar installation on composition shingle, tile and stone-coated steel roofs. Advantages: Reliable, easy to install and cost-effective MageMount Rail-less Solar Mounting SystemComponents: Roof attachment with MageBolt, and Module Connector Tools needed: 1/2” hex socket Certifications: UL 2703 How does it install: It is rail-less solar mounting system for solar installation on composition shingle, tile and stone-coated steel roofs. It has only two components, Module Connector and Comp Foot. Comp Foot is attached to the roof and also secures solar module. Module Connector connects two adjacent solar modules for additional stability and bonding. Advantages: Lower cost. Easy to ship, carry and install. L-foot with FlashingComponents: L-foot with Flashing Tools needed: 1/2” hex socket Certifications: N/A How does it install: L-foot with Flashing is roof attachment for composition shingle roof. Flashing is secured by attaching it to the vertical portion of the L bracket with a bolt. Advantages: It has a unique and patented flashing design with no hole on the flashing surface so it is absolutely waterproof. It has a simple design and is intuitive to install. C&I metal roof: Rail-less Standing Seam Metal Roof Mounting KitsComponents: Mid Clamp Mounting Kit and End Clamp Mounting Kit Tools needed: 1/2” hex socket and 3/16” Allen key drive Certifications: UL 2703 How does it install: Each kit has two components, MageBlock and mid or end clamp. MageBlock is attached to standing seam with two set screws. Mid or end clamp slides on top of MageBlock and secures solar module onto MageBlock. Advantages: It has only two pre-assembled components, Mid-clamp Mounting Kit and End-clamp Mounting Kit. Each kit is 3”x3”x1” and multiple kits can be packed in one box. The cost is only one-third of rail-based mounting system and it is easy to install. C&I metal roof: MageBracket RH, RL, CH and CL mounting bracketsComponents: One mounting bracket Tools needed: Hex socket Certifications: N/A How does it install: MageBracket RH, RL or CH has two angle-adjustable brackets that can be attached to the side of the rib for better waterproofing. MageBracket CL has two width-adjustable brackets that can be attached on the top of the rib of corrugated metal roof. Advantages: Angle-adjustable and width-adjustable rib mounting brackets fit most common R-Panel trapezoidal and corrugated metal roofs. They have better waterproofing capabilities and are strong roof attachment with mounting screws attached to the sides of the rib or into the structural element. The optional L bracket is ready to be attached to rails. C&I metal roof: MageBracket RH/RL Rail-less Mounting KitComponents: Mid Clamp Mounting Kit and End Clamp Mounting Kit Tools needed: Hex socket How does it install: MageBracket RH or RL Mounting Kit is a simple and low-cost rail-less solar mounting system for R-panel trapezoidal metal roof. It has only two parts, mounting bracket and mid or end clamp. The angle-adjustable bracket with EPDM sealant fits most R-panel metal roof and is attached to the side of rib with self-tapping screws for better waterproofing. It utilizes the rib as rail and the bracket creates a mounting platform where the mid and end clamps secure solar panels on top of the bracket. Advantages: It reduces mounting components dramatically, saves installation time and cost significantly and looks better aesthetically. Similar mounting kits are also available for standing seam metal roof and any metal roof with flat portion on the roof. C&I metal roof: MageBracket F Rail-less Mounting Kit Components: Mid Clamp Mounting Kit and End Clamp Mounting Kit Tools needed: Hex socket How does it install: MageBracket F Mounting Kit is a simple and low-cost rail-less solar mounting system for R-panel trapezoidal or standing seam metal roof or any metal roof with 3”x4” flat area for each mounting kit. It has only two parts, mounting bracket and mid or end clamp. Mounting bracket is attached to any 3”x4” or larger flat area on the roof with butyl sealant and secured to the deck or structure using up to four roofing fasteners. Universal mid and end clamps fit almost all solar panels. Advantages: The bracket is attached to roof structure and can withstand stronger wind and heavier load. It reduces mounting components dramatically, saves installation time and cost significantly and looks better aesthetically. MageFoot Rail-less Mounting Kit for Composite Shingle RoofComponents: Mid Clamp Mounting Kit and End Clamp Mounting Kit Tools needed: Hex Socket Certifications: N/A Installation: MageFoot Rail-less Mounting Kit is a simple and low-cost rail-less solar mounting system for composite shingle roof. It has only two parts, mounting foot and mid or end clamp. Mounting foot is deck-mount bracket with butyl sealing gasket on the bottom. It can be attached to roof deck with four mounting screws or to structural element such as rafter with two lag screws. The mid clamp has integrated bonding capability to bond two adjacent solar modules when tightened. The universal end clamp fits all framed solar modules. It reduces mounting components, lower shipping cost, saves installation time and cost and looks better aesthetically. Advantages: MageFoot Rail-less Mounting Kit is a simple and low-cost rail-less solar mounting system for composite shingle roof with only two parts, mounting bracket and mid or end clamp. It can be mounted on deck or to rafter. It reduces mounting components dramatically, saves installation time and cost significantly and looks better aesthetically.
Components: Rail, Mid Clamp, End Clamp, Roof attachment with rail nut, and Rail splice Tools needed: 1/2” hex socket Certifications: UL 2703
Installation: It is a rail-based solar mounting system for solar installation on composition shingle, tile and stone-coated steel roofs.
Advantages: Reliable, easy to install and cost-effective
Components: Roof attachment with MageBolt, and Module Connector Tools needed: 1/2” hex socket Certifications: UL 2703
How does it install: It is rail-less solar mounting system for solar installation on composition shingle, tile and stone-coated steel roofs. It has only two components, Module Connector and Comp Foot. Comp Foot is attached to the roof and also secures solar module. Module Connector connects two adjacent solar modules for additional stability and bonding.
Advantages: Lower cost. Easy to ship, carry and install.
Components: L-foot with Flashing Tools needed: 1/2” hex socket Certifications: N/A
How does it install: L-foot with Flashing is roof attachment for composition shingle roof. Flashing is secured by attaching it to the vertical portion of the L bracket with a bolt.
Advantages: It has a unique and patented flashing design with no hole on the flashing surface so it is absolutely waterproof. It has a simple design and is intuitive to install.
Components: Mid Clamp Mounting Kit and End Clamp Mounting Kit Tools needed: 1/2” hex socket and 3/16” Allen key drive Certifications: UL 2703
How does it install: Each kit has two components, MageBlock and mid or end clamp. MageBlock is attached to standing seam with two set screws. Mid or end clamp slides on top of MageBlock and secures solar module onto MageBlock.
Advantages: It has only two pre-assembled components, Mid-clamp Mounting Kit and End-clamp Mounting Kit. Each kit is 3”x3”x1” and multiple kits can be packed in one box. The cost is only one-third of rail-based mounting system and it is easy to install.
Components: One mounting bracket Tools needed: Hex socket Certifications: N/A
How does it install: MageBracket RH, RL or CH has two angle-adjustable brackets that can be attached to the side of the rib for better waterproofing. MageBracket CL has two width-adjustable brackets that can be attached on the top of the rib of corrugated metal roof.
Advantages: Angle-adjustable and width-adjustable rib mounting brackets fit most common R-Panel trapezoidal and corrugated metal roofs. They have better waterproofing capabilities and are strong roof attachment with mounting screws attached to the sides of the rib or into the structural element. The optional L bracket is ready to be attached to rails.
Components: Mid Clamp Mounting Kit and End Clamp Mounting Kit Tools needed: Hex socket
How does it install: MageBracket RH or RL Mounting Kit is a simple and low-cost rail-less solar mounting system for R-panel trapezoidal metal roof. It has only two parts, mounting bracket and mid or end clamp. The angle-adjustable bracket with EPDM sealant fits most R-panel metal roof and is attached to the side of rib with self-tapping screws for better waterproofing. It utilizes the rib as rail and the bracket creates a mounting platform where the mid and end clamps secure solar panels on top of the bracket.
Advantages: It reduces mounting components dramatically, saves installation time and cost significantly and looks better aesthetically. Similar mounting kits are also available for standing seam metal roof and any metal roof with flat portion on the roof.
Components: Mid Clamp Mounting Kit and End Clamp Mounting Kit Tools needed: Hex socket
How does it install: MageBracket F Mounting Kit is a simple and low-cost rail-less solar mounting system for R-panel trapezoidal or standing seam metal roof or any metal roof with 3”x4” flat area for each mounting kit. It has only two parts, mounting bracket and mid or end clamp. Mounting bracket is attached to any 3”x4” or larger flat area on the roof with butyl sealant and secured to the deck or structure using up to four roofing fasteners. Universal mid and end clamps fit almost all solar panels.
Advantages: The bracket is attached to roof structure and can withstand stronger wind and heavier load. It reduces mounting components dramatically, saves installation time and cost significantly and looks better aesthetically.
Components: Mid Clamp Mounting Kit and End Clamp Mounting Kit Tools needed: Hex Socket Certifications: N/A
Installation: MageFoot Rail-less Mounting Kit is a simple and low-cost rail-less solar mounting system for composite shingle roof. It has only two parts, mounting foot and mid or end clamp. Mounting foot is deck-mount bracket with butyl sealing gasket on the bottom. It can be attached to roof deck with four mounting screws or to structural element such as rafter with two lag screws. The mid clamp has integrated bonding capability to bond two adjacent solar modules when tightened. The universal end clamp fits all framed solar modules. It reduces mounting components, lower shipping cost, saves installation time and cost and looks better aesthetically.
Advantages: MageFoot Rail-less Mounting Kit is a simple and low-cost rail-less solar mounting system for composite shingle roof with only two parts, mounting bracket and mid or end clamp. It can be mounted on deck or to rafter. It reduces mounting components dramatically, saves installation time and cost significantly and looks better aesthetically.
For 40 years, OMG Roofing Products has been a leading supplier of fasteners and other products used exclusively in commercial roofing applications, and to secure commercial roofs to the deck. OMG works with all the major roof system manufacturers, and its field sales representatives are on commercial roofs every day. PowerGrip Universal 7 (PGU-7)Number of pieces: 2 Tools needed: Screw gun, wrench, torque wrench, water block bedding sealant, OMG roofing fasteners. How does it install: OMG PGU-7 units are installed with four roofing fasteners for the specific deck-type. Fasteners should be installed with a standard screw gun rather than an impact driver, and cap bolts must be secured in a crisscross pattern to 60-70 inch pounds. A bead of water block sealant is installed around the perimeter of the bottom side of the top plate for added protection. Advantages: For all commercial roof types (i.e., TPO, PVC, EPDM, modified bitumen, and BUR), but not compatible with residential shingles or tiles. Also, with most ballast and rail-based commercial solar rack systems. PGU-7s are secured directly to the deck and do not need to be secured to the structural members. This often eliminates the need for ballast and protects insulation from being compressed. PGU-7 units are watertight without flashing, which saves labor and eliminates the need for power on the roof during installation. Units can be installed in about four minutes. PGU-7 provides tensile strength of 2,051 lbf (9.12 kN), shear strength of 1,581 lbf (7.03 kN), and compressive strength of 2,214 lbf (9.84 kN). C&I flat roof: PowerGrip StandardNumber of pieces: 1 Tools needed: Screw gun, fastener gauge card (supplied), thermoplastic roof hand welder, OMG roofing screws. How does it install: The PowerGrip Standard is secured with the recommended roofing fastener through the roof and deck with a minimum deck penetration 3 ⁄4-in. [20 mm] into steel, and 1-in. [25 mm] into wood. The fastener head should sit firmly on the gauge card but should not be overdriven. Slide the PowerGrip assembly over the head of the fastener. The unit should sit snuggly onto the roof membrane. Heat Weld the flange of the PowerGrip to the roofing membrane per the manufacturer’s specifications and seal cut edges as required. Advantages: Made with exactly the same thermoplastic (i.e., TPO or PVC) membrane that’s on the roof. Watertight. Helps protect single-ply roof covers from damage due to ballasted rack movement. Can help eliminate some ballast, to take excessive weight off the roof. Takes the wind-load off the roof cover and puts it onto the structural deck where it belongs. Offers tensile and shear strength of 305 lbf (1.35 kN). Only for use with ballasted systems on POV or TPO roofing membrane. C&I flat roof: PowerGrip PlusNumber of pieces: 1 Tools needed: Screw gun, fastener gauge card (supplied), thermoplastic roof hand welder, sealant. Certifications: n/a How does it install: The PowerGrip Standard is secured with the recommended roofing fastener through the roof and deck with a minimum deck penetration 3 ⁄4-in. [20 mm] into steel, and 1-in. [25 mm] into wood. The fastener head should sit firmly on the gauge card but should not be overdriven. Slide the PowerGrip Plus assembly over the head of the fastener. Then lift the flange and install eight additional fasteners through the PowerGrip Plus plate, hitting the top flutes. The unit should sit snuggly onto the roof membrane. Heat Weld the flange to the roofing membrane per the manufacturer’s specifications and seal cut edges as required. Advantages: Made with exactly the same thermoplastic (i.e., TPO or PVC) membrane that’s on the roof. Watertight. Helps protect single-ply roof covers from damage due to ballasted rack movement. Can help eliminate ballast, to take excessive weight off the roof. Takes the wind-load off the roof cover and puts it onto the structural deck where it belongs. Offers tensile strength of 2,000 lbf (8.90 kN) and shear strength of 1,075 lbf (4.78 kN). Only for use with ballasted systems on POV or TPO roofing membrane. PowerGrip Universal 11 (PGU-11)Number of pieces: 2 Tools needed: Screw gun, wrench, torque wrench, water block begging sealant, OMG roofing fasteners. How does it install: OMG PGU-11 units are installed with six roofing fasteners for the specific roof deck-type. Fasteners should be installed with a standard screw gun rather than an impact driver, following the star pattern provided on the base plate. Apply a bead of water block bedding sealant around the perimeter of the bottom side of the cover plate. Align the cover over the base plate and bolt it in place with four bolts supplied, at a torque of 60-70 lbs. Advantages: For all low-slope commercial roof types (i.e., TPO, PVC, EPDM, modified bitumen, and BUR), and compatible with most ballast and rail-based commercial solar rack systems. PGU-11s are secured directly to the deck thereby transferring wind uplift and dead weight loads directly to the structural members. This often eliminates the need for ballast and protects insulation from being compressed. PGU-11 units are watertight without flashing, which saves labor and eliminates the need for power on the roof during installation. Offers tensile strength of 3,343 lbf (14.8 kN), shear strength of 2,537 lbf (11.3 kN), and compressive strength of 2,749 lbf (12.2 kN).
Number of pieces: 2 Tools needed: Screw gun, wrench, torque wrench, water block bedding sealant, OMG roofing fasteners.
How does it install: OMG PGU-7 units are installed with four roofing fasteners for the specific deck-type. Fasteners should be installed with a standard screw gun rather than an impact driver, and cap bolts must be secured in a crisscross pattern to 60-70 inch pounds. A bead of water block sealant is installed around the perimeter of the bottom side of the top plate for added protection.
Advantages: For all commercial roof types (i.e., TPO, PVC, EPDM, modified bitumen, and BUR), but not compatible with residential shingles or tiles. Also, with most ballast and rail-based commercial solar rack systems. PGU-7s are secured directly to the deck and do not need to be secured to the structural members. This often eliminates the need for ballast and protects insulation from being compressed. PGU-7 units are watertight without flashing, which saves labor and eliminates the need for power on the roof during installation. Units can be installed in about four minutes. PGU-7 provides tensile strength of 2,051 lbf (9.12 kN), shear strength of 1,581 lbf (7.03 kN), and compressive strength of 2,214 lbf (9.84 kN).
Number of pieces: 1 Tools needed: Screw gun, fastener gauge card (supplied), thermoplastic roof hand welder, OMG roofing screws.
How does it install: The PowerGrip Standard is secured with the recommended roofing fastener through the roof and deck with a minimum deck penetration 3 ⁄4-in. [20 mm] into steel, and 1-in. [25 mm] into wood. The fastener head should sit firmly on the gauge card but should not be overdriven. Slide the PowerGrip assembly over the head of the fastener. The unit should sit snuggly onto the roof membrane. Heat Weld the flange of the PowerGrip to the roofing membrane per the manufacturer’s specifications and seal cut edges as required.
Advantages: Made with exactly the same thermoplastic (i.e., TPO or PVC) membrane that’s on the roof. Watertight. Helps protect single-ply roof covers from damage due to ballasted rack movement. Can help eliminate some ballast, to take excessive weight off the roof. Takes the wind-load off the roof cover and puts it onto the structural deck where it belongs. Offers tensile and shear strength of 305 lbf (1.35 kN). Only for use with ballasted systems on POV or TPO roofing membrane.
Number of pieces: 1 Tools needed: Screw gun, fastener gauge card (supplied), thermoplastic roof hand welder, sealant. Certifications: n/a
How does it install: The PowerGrip Standard is secured with the recommended roofing fastener through the roof and deck with a minimum deck penetration 3 ⁄4-in. [20 mm] into steel, and 1-in. [25 mm] into wood. The fastener head should sit firmly on the gauge card but should not be overdriven. Slide the PowerGrip Plus assembly over the head of the fastener. Then lift the flange and install eight additional fasteners through the PowerGrip Plus plate, hitting the top flutes. The unit should sit snuggly onto the roof membrane. Heat Weld the flange to the roofing membrane per the manufacturer’s specifications and seal cut edges as required.
Advantages: Made with exactly the same thermoplastic (i.e., TPO or PVC) membrane that’s on the roof. Watertight. Helps protect single-ply roof covers from damage due to ballasted rack movement. Can help eliminate ballast, to take excessive weight off the roof. Takes the wind-load off the roof cover and puts it onto the structural deck where it belongs. Offers tensile strength of 2,000 lbf (8.90 kN) and shear strength of 1,075 lbf (4.78 kN). Only for use with ballasted systems on POV or TPO roofing membrane.
Number of pieces: 2 Tools needed: Screw gun, wrench, torque wrench, water block begging sealant, OMG roofing fasteners.
How does it install: OMG PGU-11 units are installed with six roofing fasteners for the specific roof deck-type. Fasteners should be installed with a standard screw gun rather than an impact driver, following the star pattern provided on the base plate. Apply a bead of water block bedding sealant around the perimeter of the bottom side of the cover plate. Align the cover over the base plate and bolt it in place with four bolts supplied, at a torque of 60-70 lbs.
Advantages: For all low-slope commercial roof types (i.e., TPO, PVC, EPDM, modified bitumen, and BUR), and compatible with most ballast and rail-based commercial solar rack systems. PGU-11s are secured directly to the deck thereby transferring wind uplift and dead weight loads directly to the structural members. This often eliminates the need for ballast and protects insulation from being compressed. PGU-11 units are watertight without flashing, which saves labor and eliminates the need for power on the roof during installation. Offers tensile strength of 3,343 lbf (14.8 kN), shear strength of 2,537 lbf (11.3 kN), and compressive strength of 2,749 lbf (12.2 kN).
Point Load Power is a cleantech company leading the advancement of rooftop solar tracking for commercial and industrial (C&I) buildings while making it highly profitable for every partner and stakeholder involved. C&I flat roof: PV BoosterNumber of pieces: 12 Tools needed: Socket Wrench, Wire Crimper Certifications: CSA for UL 3703 How does it install: PV Booster is mechanically attached to flat C&I rooftops. The three major subsystems install fast by torquing our tripod (support system) down to the mechanical attachment (included), bolting on the drive mechanism (actuator), and installing the h-frame (panel support). Panels are then mounted on the h-frame. The system is wired up in strings of 30 or less to our tracker distribution boxes (control hardware) mounted on the rooftops. The 30 degree tilted vertical axis tracker significantly improves energy production and requires about 1’ between panels to allow for a full range of tracking motion to achieve that goal. A small, wall-mounted control computer is installed in the mechanical/electrical room near the inverters to ensure functionality if the site loses internet connectivity. Advantages: PV Booster brings tracking to flat C&I rooftops to dramatically increase system efficiency with a smaller footprint which significantly reduces the LCOE of your projects. PV Booster allows building owners to use less equipment to produce more energy from every panel. Our systems produce 30-40% more energy out of every monofacial panel. PV Booster is the best mounting solution for bifacial modules as well, producing as much as 70% more energy out of bifacial panel. Produce more with less using PV Booster, rooftop tracker.
Number of pieces: 12 Tools needed: Socket Wrench, Wire Crimper Certifications: CSA for UL 3703
How does it install: PV Booster is mechanically attached to flat C&I rooftops. The three major subsystems install fast by torquing our tripod (support system) down to the mechanical attachment (included), bolting on the drive mechanism (actuator), and installing the h-frame (panel support). Panels are then mounted on the h-frame. The system is wired up in strings of 30 or less to our tracker distribution boxes (control hardware) mounted on the rooftops. The 30 degree tilted vertical axis tracker significantly improves energy production and requires about 1’ between panels to allow for a full range of tracking motion to achieve that goal. A small, wall-mounted control computer is installed in the mechanical/electrical room near the inverters to ensure functionality if the site loses internet connectivity.
Advantages: PV Booster brings tracking to flat C&I rooftops to dramatically increase system efficiency with a smaller footprint which significantly reduces the LCOE of your projects. PV Booster allows building owners to use less equipment to produce more energy from every panel. Our systems produce 30-40% more energy out of every monofacial panel. PV Booster is the best mounting solution for bifacial modules as well, producing as much as 70% more energy out of bifacial panel. Produce more with less using PV Booster, rooftop tracker.
WebsiteListen to more in-depth conversations on Solar Builder's YouTube channel Our most popular series include: Power Forward! | A collaboration with BayWa r.e. to discuss higher level industry topics. The Buzz | Where we give our 2 cents per kWh on the residential solar market. The Pitch | Discussions with solar manufacturers about their new technology and ideas. Tags: AceClamp, Aerocompact, Buyer's Guide, DynoRaxx, EcoFasten, IronRidge, K2 Systems, Magerack, OMG Roofing, Point Load Power, QuickBolt, Roof Tech, S-5!, SnapNrack, Solar Builder Buyer's Guide, Sollega, SunModo
Our most popular series include: Power Forward! | A collaboration with BayWa r.e. to discuss higher level industry topics. The Buzz | Where we give our 2 cents per kWh on the residential solar market. The Pitch | Discussions with solar manufacturers about their new technology and ideas.
Other Benjamin Media, Inc Brands: Compact Equipment | Trenchless Technology | Tunnel Business Magazine | Utility Contractor | Water Finance & Management
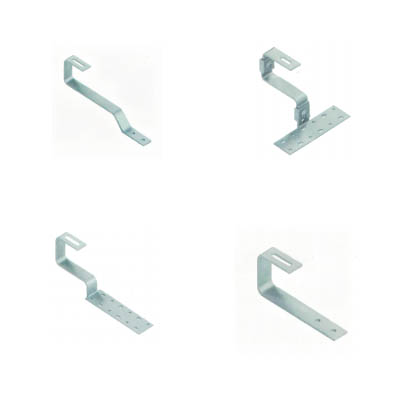
Solar Panel Bracket U Profile ©2024 Copyright Solar Builder Magazine | Wordpress Website by OuterBox